Chenille yarn is certainly having a moment these days! It has a way of making amigurumi projects even more soft and cuddly, plus nothing beats super bulky yarn, for making larger stuffies quickly! It’s no wonder it has become so wildly popular! Chenille does have its downside however; its fuzzy texture can cause some unfortunate issues. One of the most common is the “ugly bump”.
When making a circle in the round with a chenille yarn, the center of the circle does not want to lay flat. Instead, it makes a protrusion, or bump right at the center. This is frustrating, but it can easily be avoided!
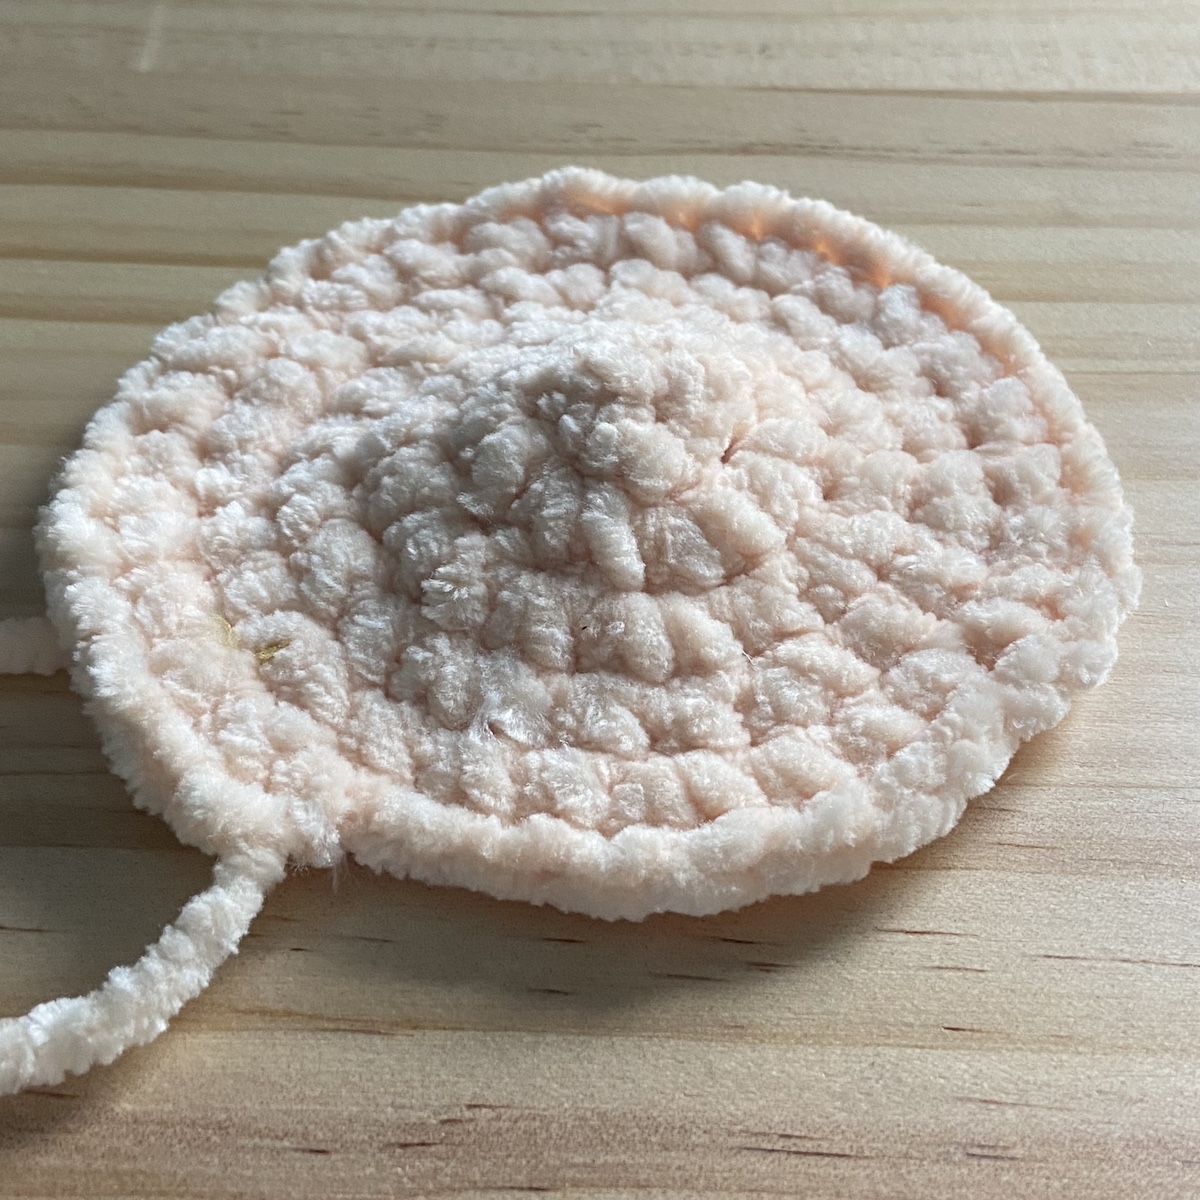
This “ugly bump” happens because the fuzzy construction of the yarn creates stitches with slightly taller proportions. When making a circle from the center out, if your stitches are taller you will need to make faster increases for the circle to lay flat. For example, in a regular yarn (like an acrylic, non-fuzzy yarn) if you are making a single crochet circle in the round you begin with 6 stitches, and then in each successive round you make 6 increases. On the second round you end with 12 stitches, then the third round 18 stitches, and 24 stitches on the fourth round, and so on. But when you make a circle with double crochet stitches you generally start with 12 stitches, then you increase by 12 stitches on each round. Then, you would have 24 stitches by the end of the second round. Notice how we had 24 stitches by round 4 when we were using the shorter single crochet stitches?
Does this mean that we need to re-write all amigurumi patterns for chenille yarn so that the increasing can happen at a different rate? Fortunately, no! There is a very easy way of getting around this issue. The proportions of chenille stitches are only slightly taller than the proportions of a smooth yarn stitch. If we increase faster right at the beginning of our circle, we can get back on track and finish the rest of the pattern as written.
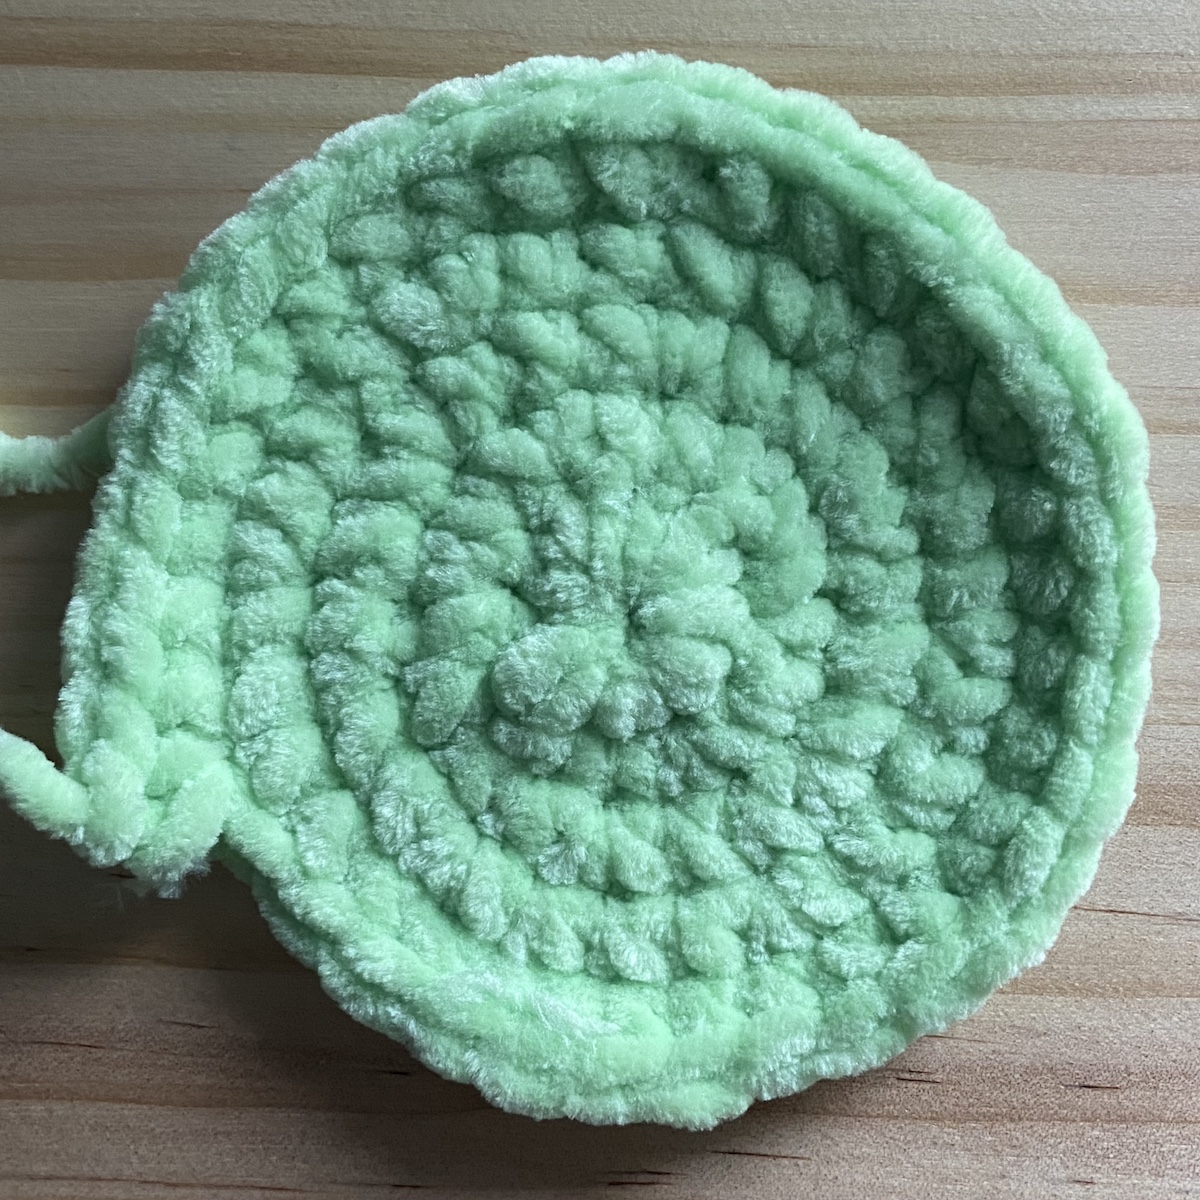
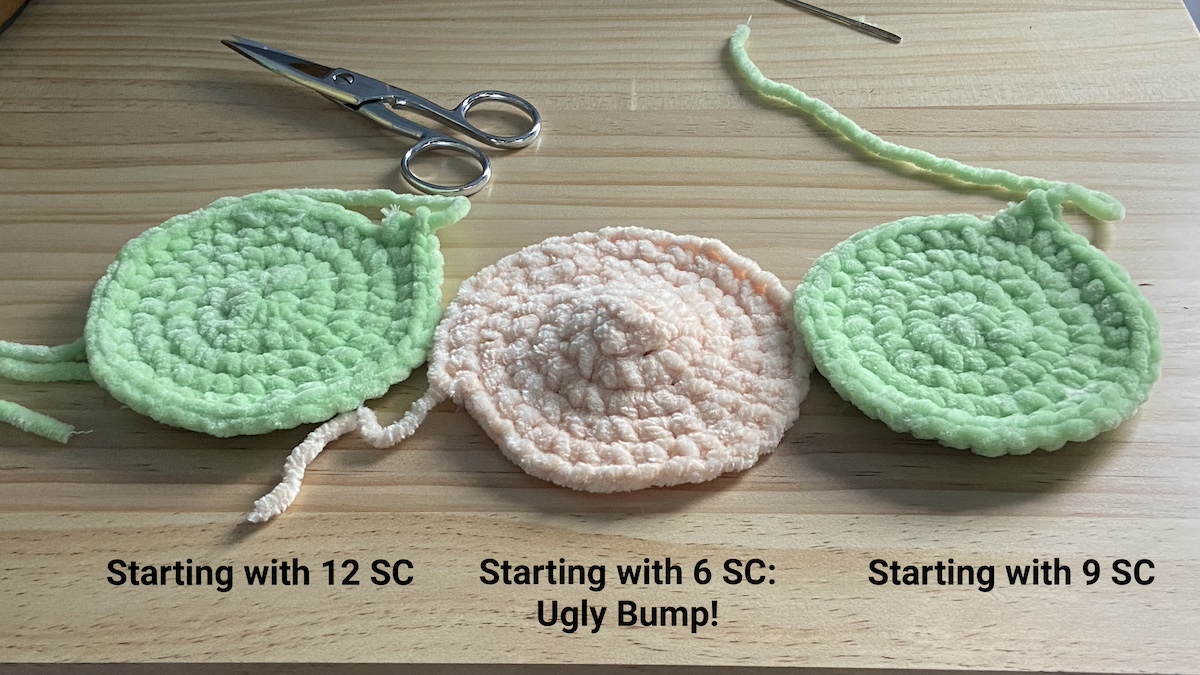
In the photo above, I omitted the very first round of 6 SC stitches and skipped right to round 2. In other words, I began with twice the number of stitches as usual in the very first round: 12 SC. On the second round, I increased by 6 stitches (the normal rate of increasing) for a total of 18 stitches at the end of Round 2. From here, I would continue increasing normally (increasing 6 times per round) to create a flat circle. If it seems crazy to start with 12 stitches at the center, then read on for my next suggestion.
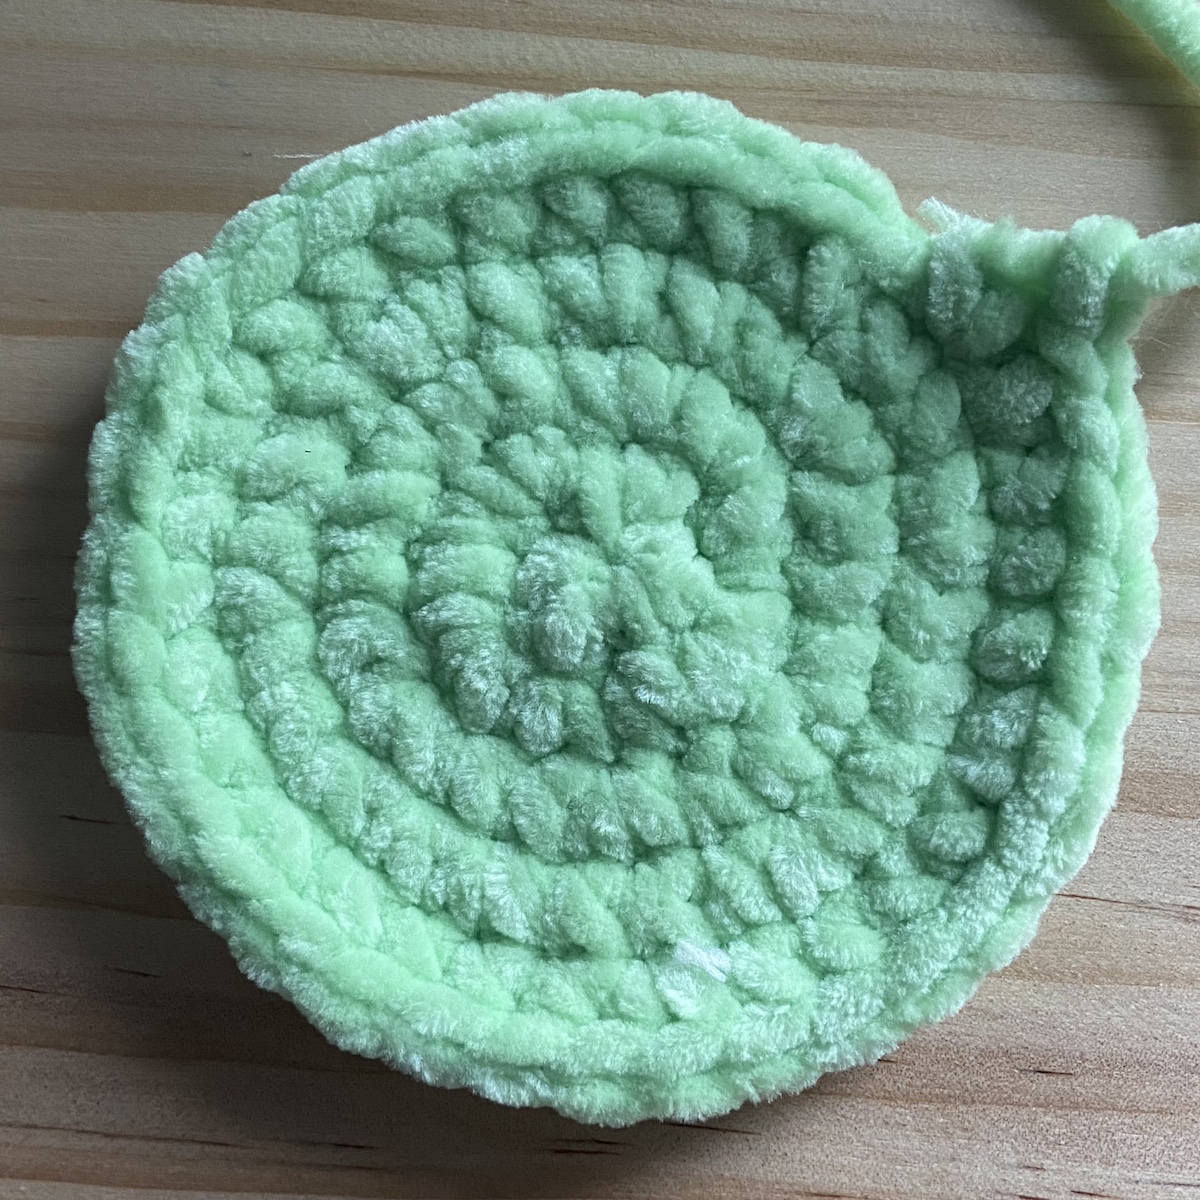
Above, I have started my circle with 9 SC. This is 3 more stitches than usual. Then in the following round I worked increases in each stitch around (increasing 9 stitches) for a total of 18 stitches by the end of Round 2. So, this has the same number of stitches as round 2 of the previous method, but we can start with fewer stitches per round. From here, we can increase normally (increasing 6 times per round) to create a flat circle.
See? It’s easy to fix this “bump” in the road to chenille amigurumi success!
I hope you try this out on your next chenille amigurumi project- you will love the results!
What about when you make amigurumi? What would be good numbers to start with for the doll head?
This is SO helpful, thank you very much :)
I can't wait to try this. I love to use the chenille yarns, but struggled with this as well.