There is nothing quite like thick, gorgeous cables to induce those warm-and-cozy winter feelings! Cables add beauty and extra warmth to our crocheted projects—it’s no wonder they are always in style when the cold weather blows our way! They look complicated, but aren’t as difficult as you might think. They’re really just the result of working post stitches out of order. But there is one question about cables that stumps lots of crocheters:
“How can I work a Front Post stitch behind the stitches that I just made? Isn’t that just a Back Post stitch?”
To answer this question, first let’s talk about how a cable works.
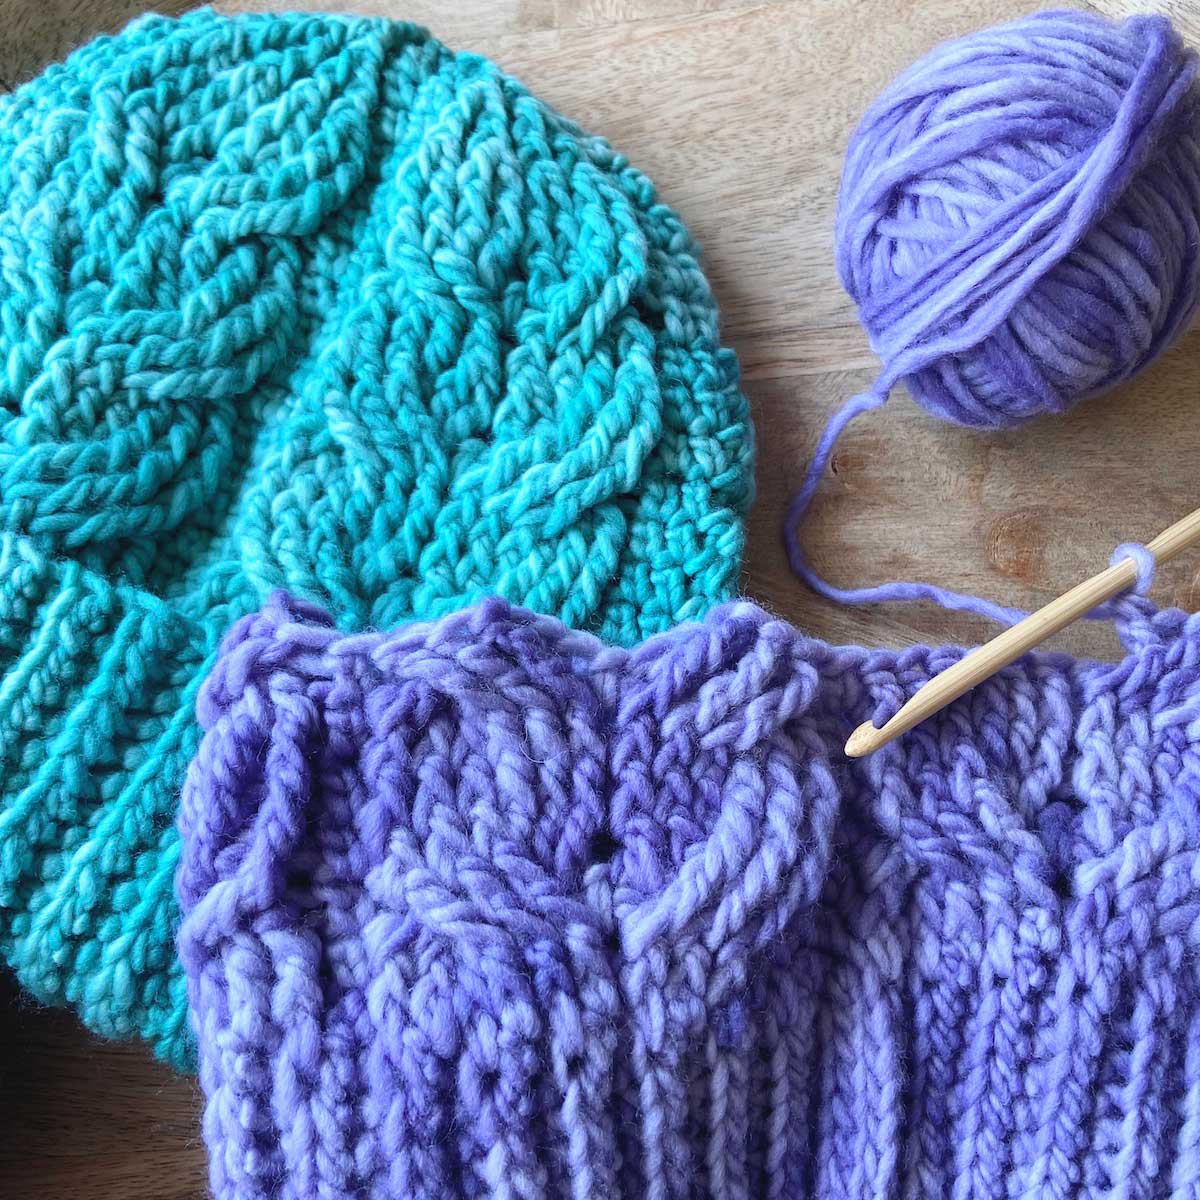
Most crocheted cables are made by establishing columns of Front Post stitches. Oftentimes these are Front Post Double Crochet stitches, but they could be other kinds of post stitches. Front Post stitches lay on the front surface of the crocheted fabric, creating the raised columns. When we work these stitches out of order, our fabric crosses over itself and creates that “twisted” look.
In the example below, we skipped the first 3 post stitches, and then we worked a Front Post treble crochet (FPtr) stitch into each of the next 3 post stitches.
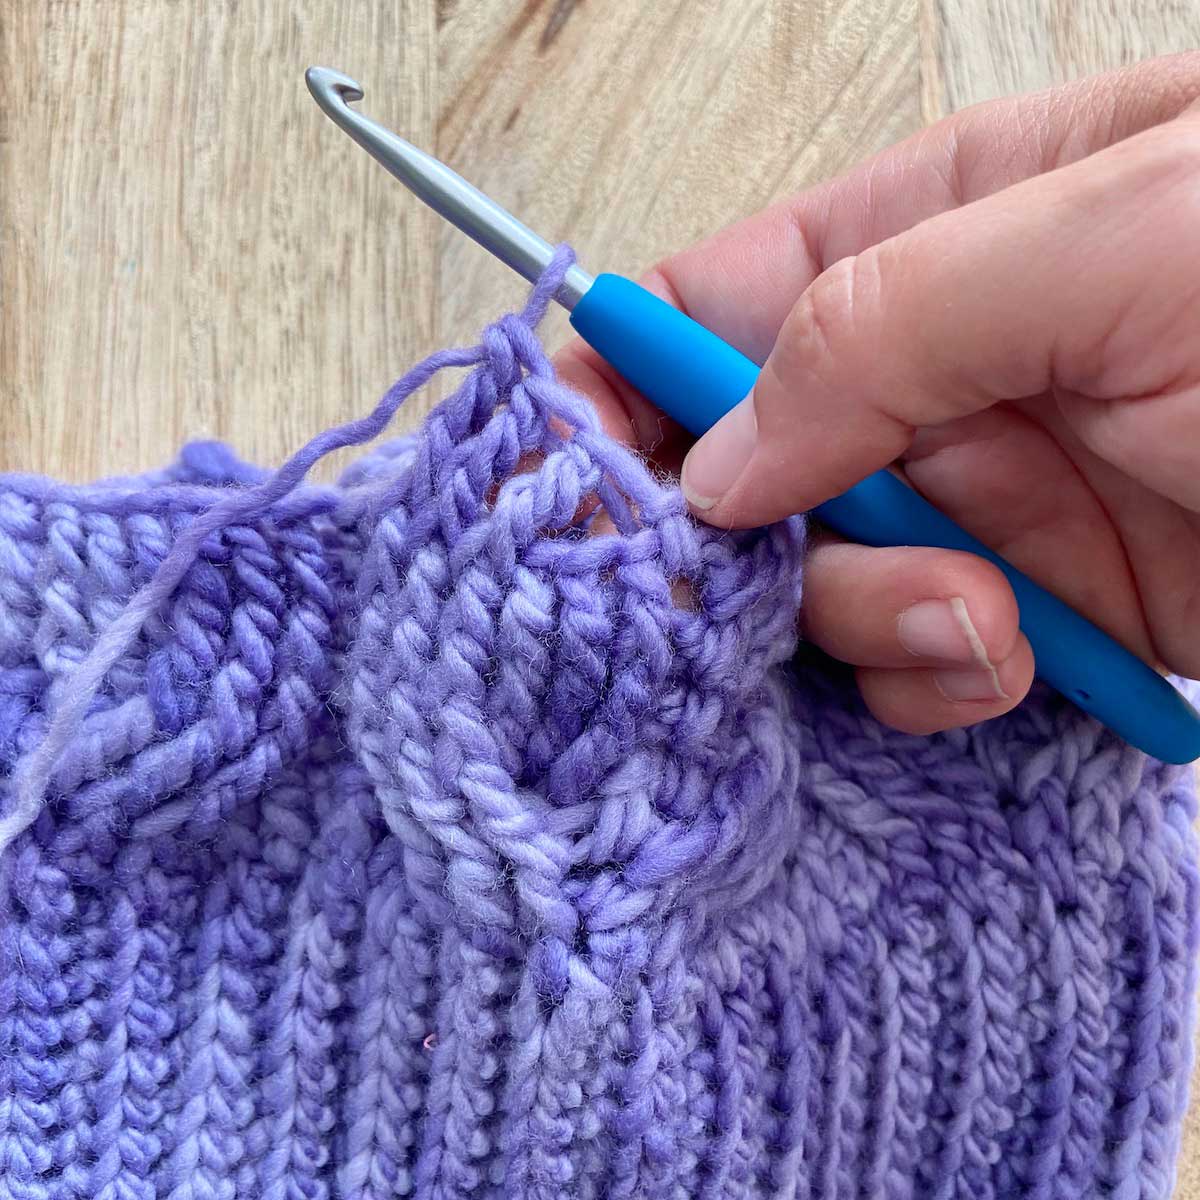
Then, working in front of the stitches we just made (and beginning with the first skipped stitch), we made 3 FPtr into each of the 3 skipped stitches. You can see that these stitches slant to the left. This is called a left-leaning cable.
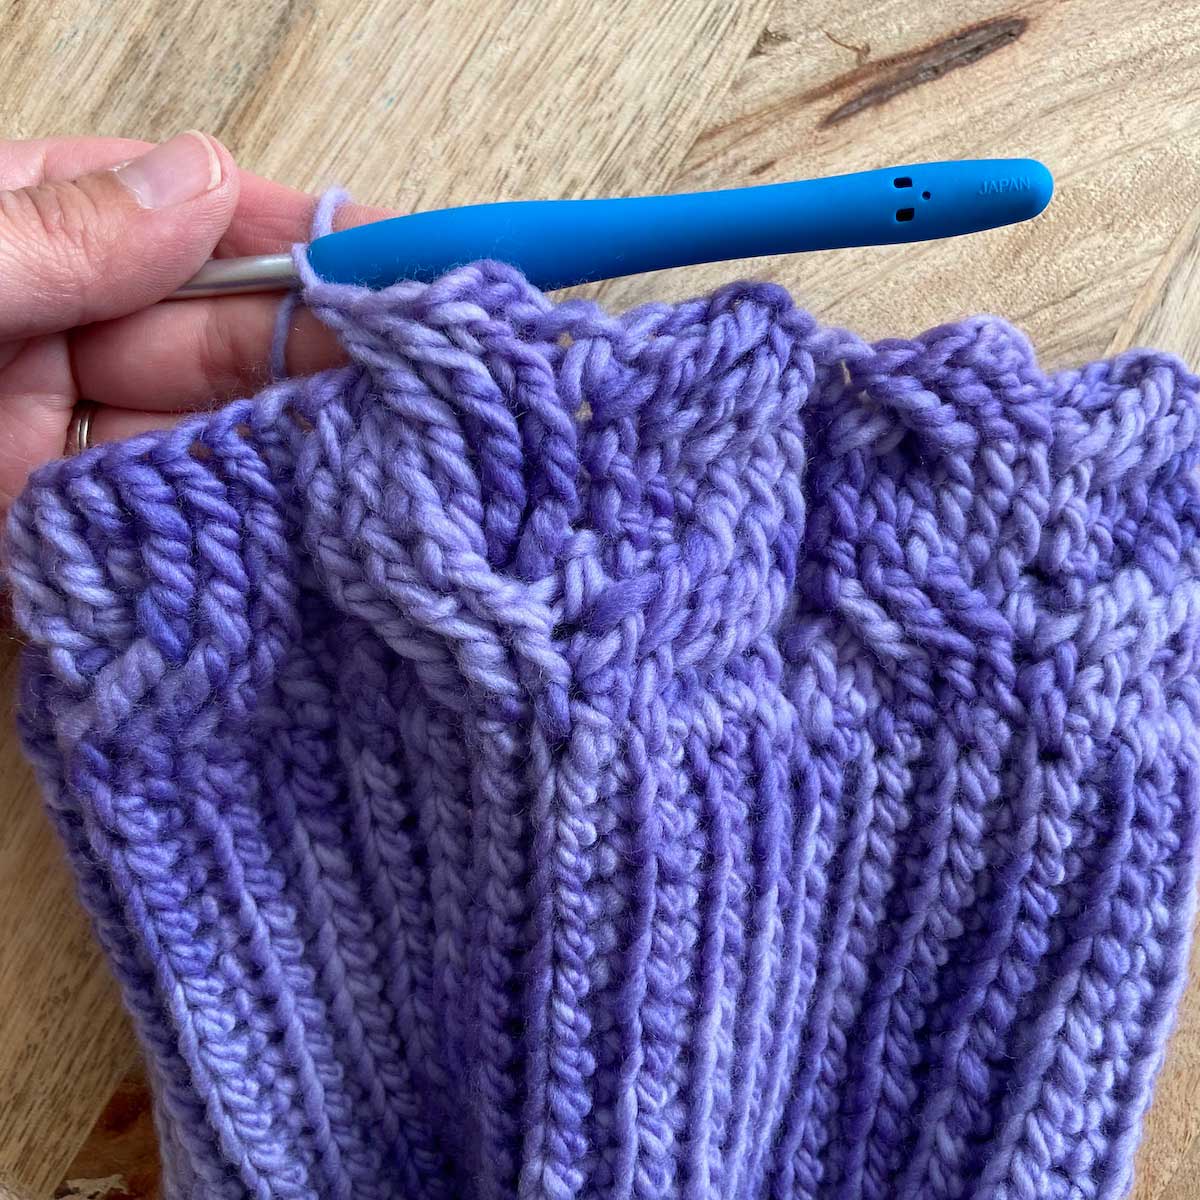
Okay, so now that we’ve seen what happens when we work in front of the stitches that we just made, what happens when we work behind the stitches that we just made?
Working a Front Post stitch behind the stitches that were just made
In the example below, again, we skipped the first 3 post stitches, then worked a Front Post treble crochet (FPtr) stitch into each of the next 3 post stitches. This is exactly the same as the previous example so far.
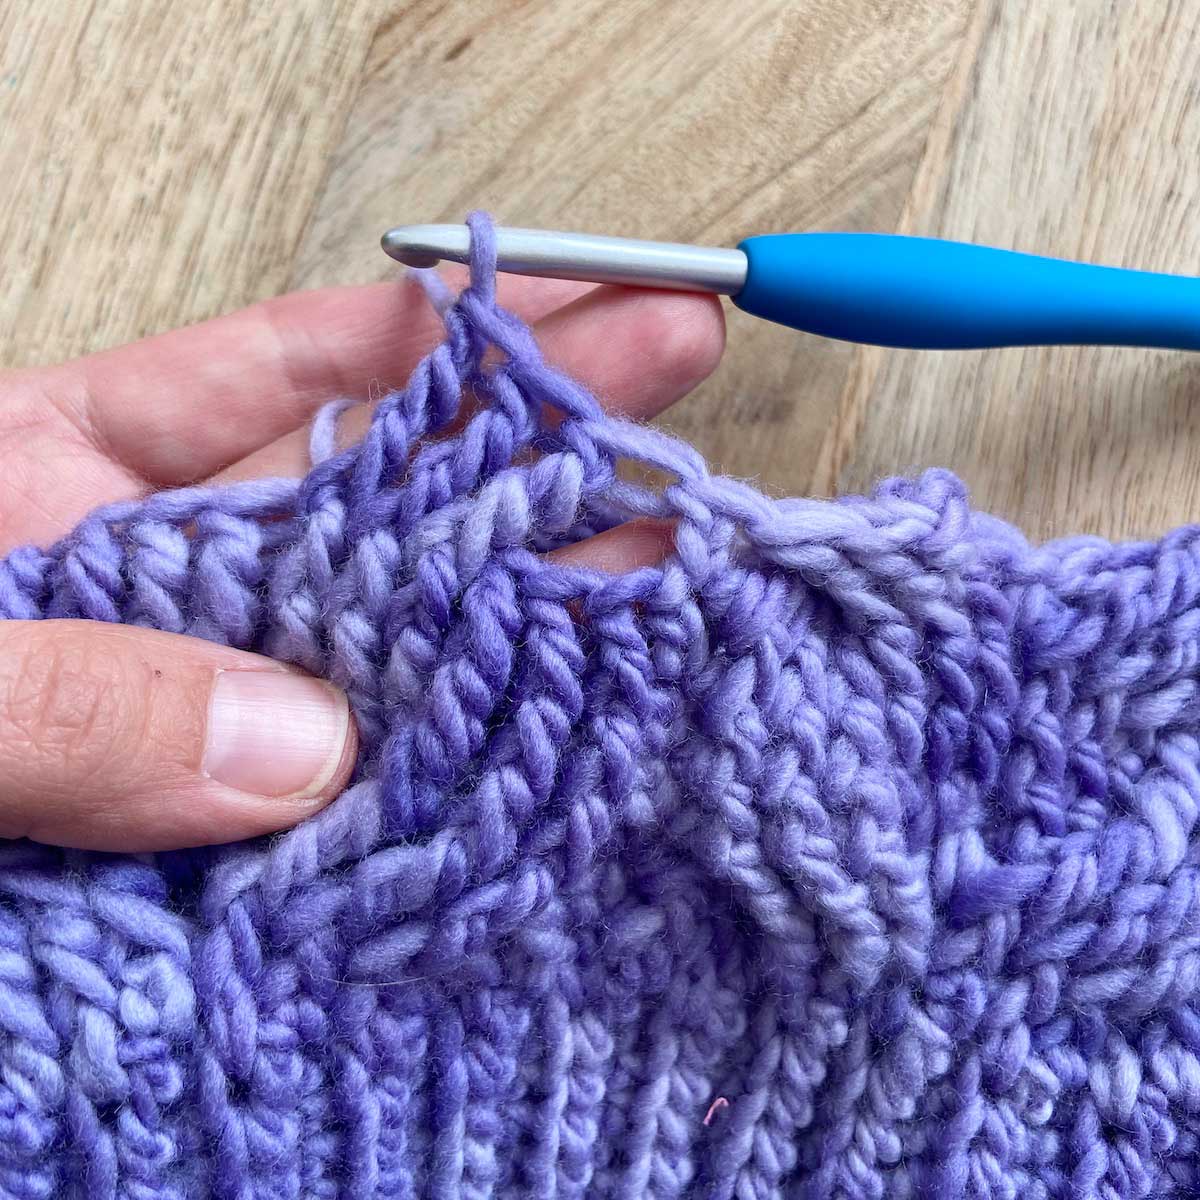
Next, we need to go back to work into those skipped stitches, but this time we will work behind the stitches that were just made. But remember, we are making Front Post stitches to get that raised look on the front of our work. So we need to work behind the stitches that were just made but into the front of the post stitches that were skipped.
In the photo below, you can see the path that the tip of my hook will take in order to go behind the stitches that were just made, but into the front of the post from the first skipped stitch.
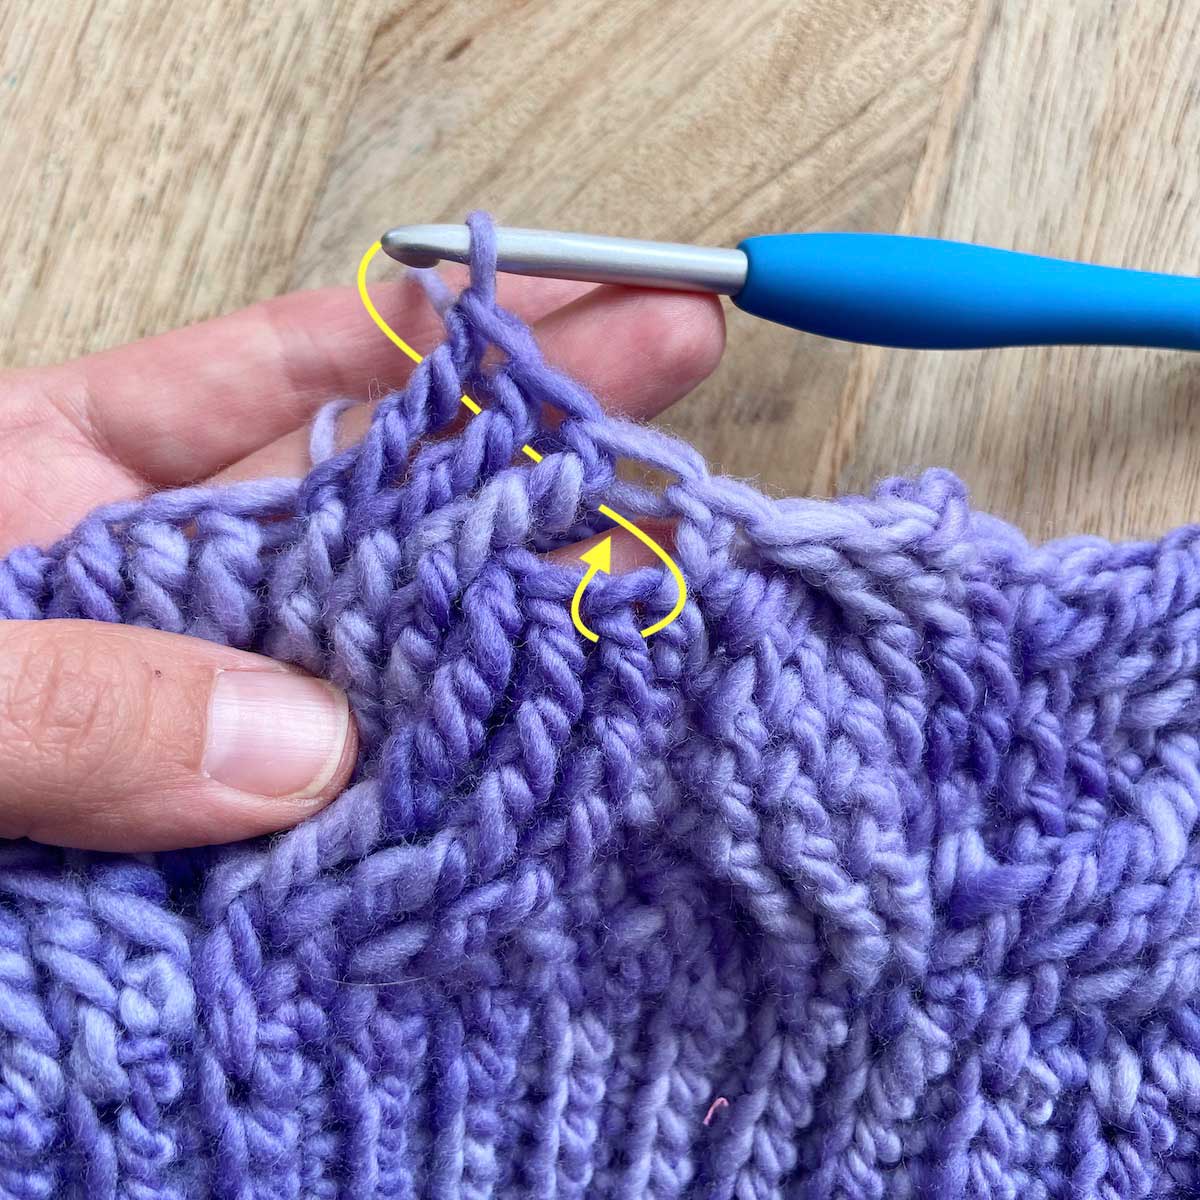
The hook is inserted under the first skipped post.
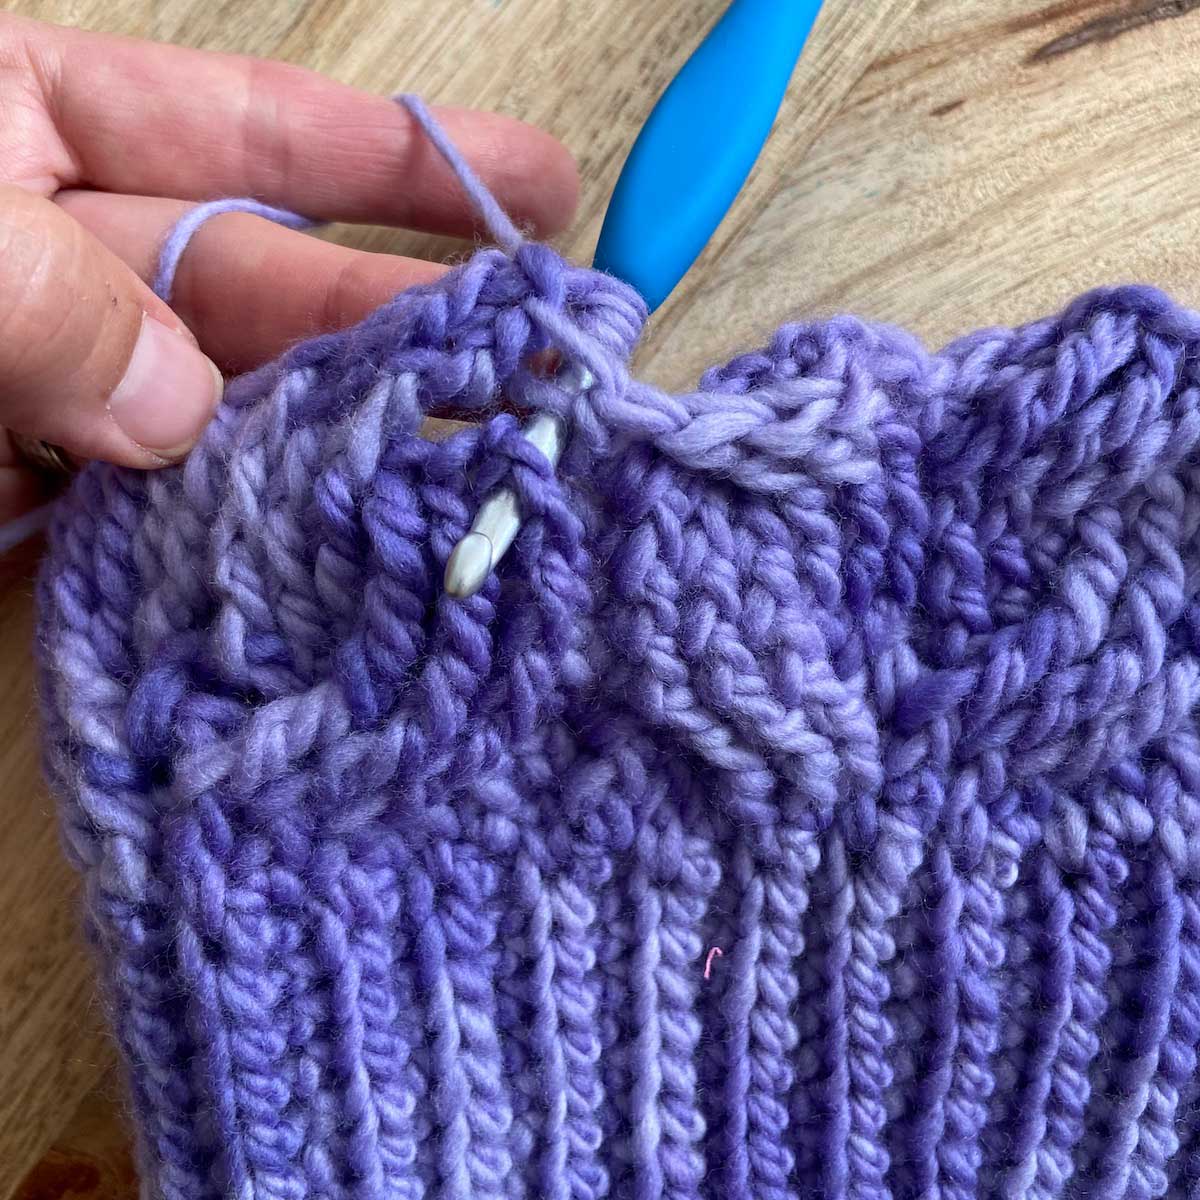
It can be easier to complete the stitch if you bring the post upward, so that it sits above the 3 sts just made. Then you can see what you are doing. The photo below shows the path that the tip of the hook will take to bring that post upward.
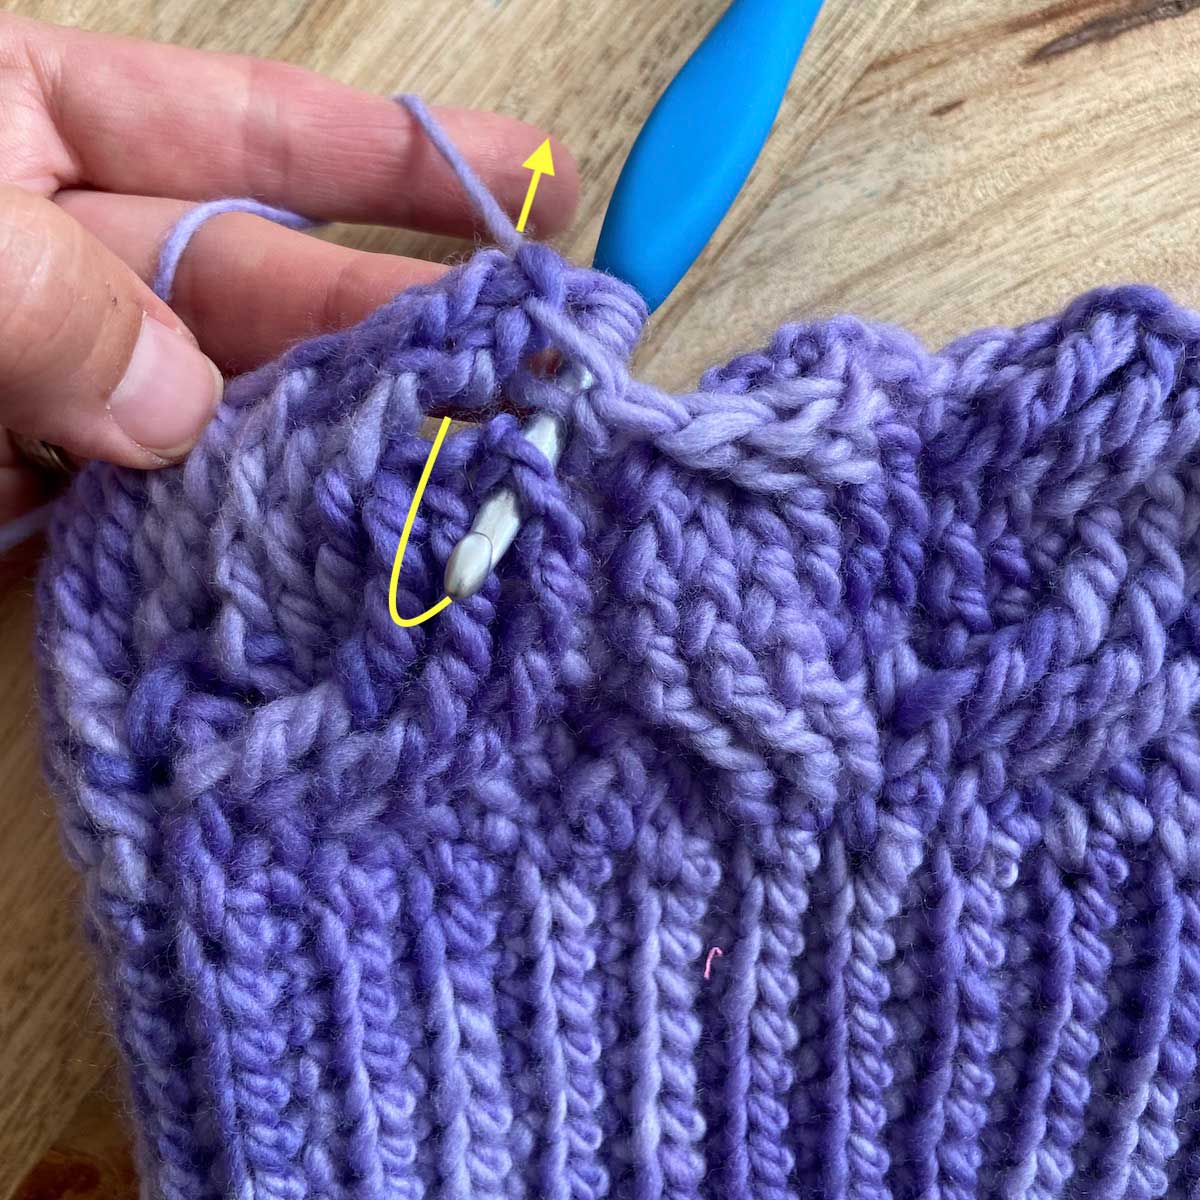
Now you can see that the post has been pulled up above the stitches in front, and it can be completed as a FPtr.
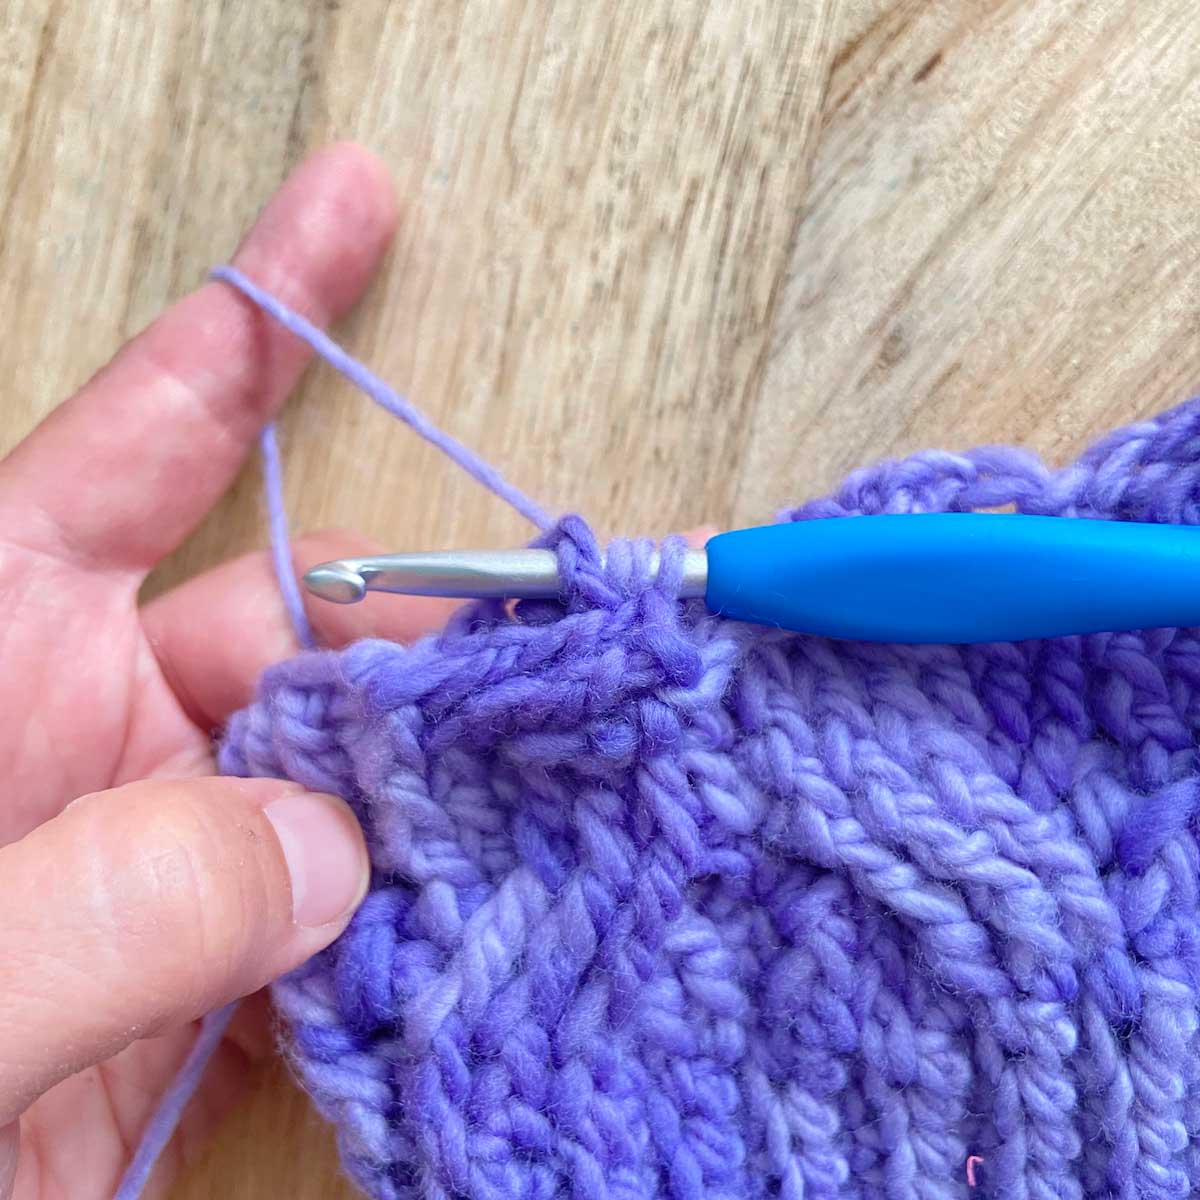
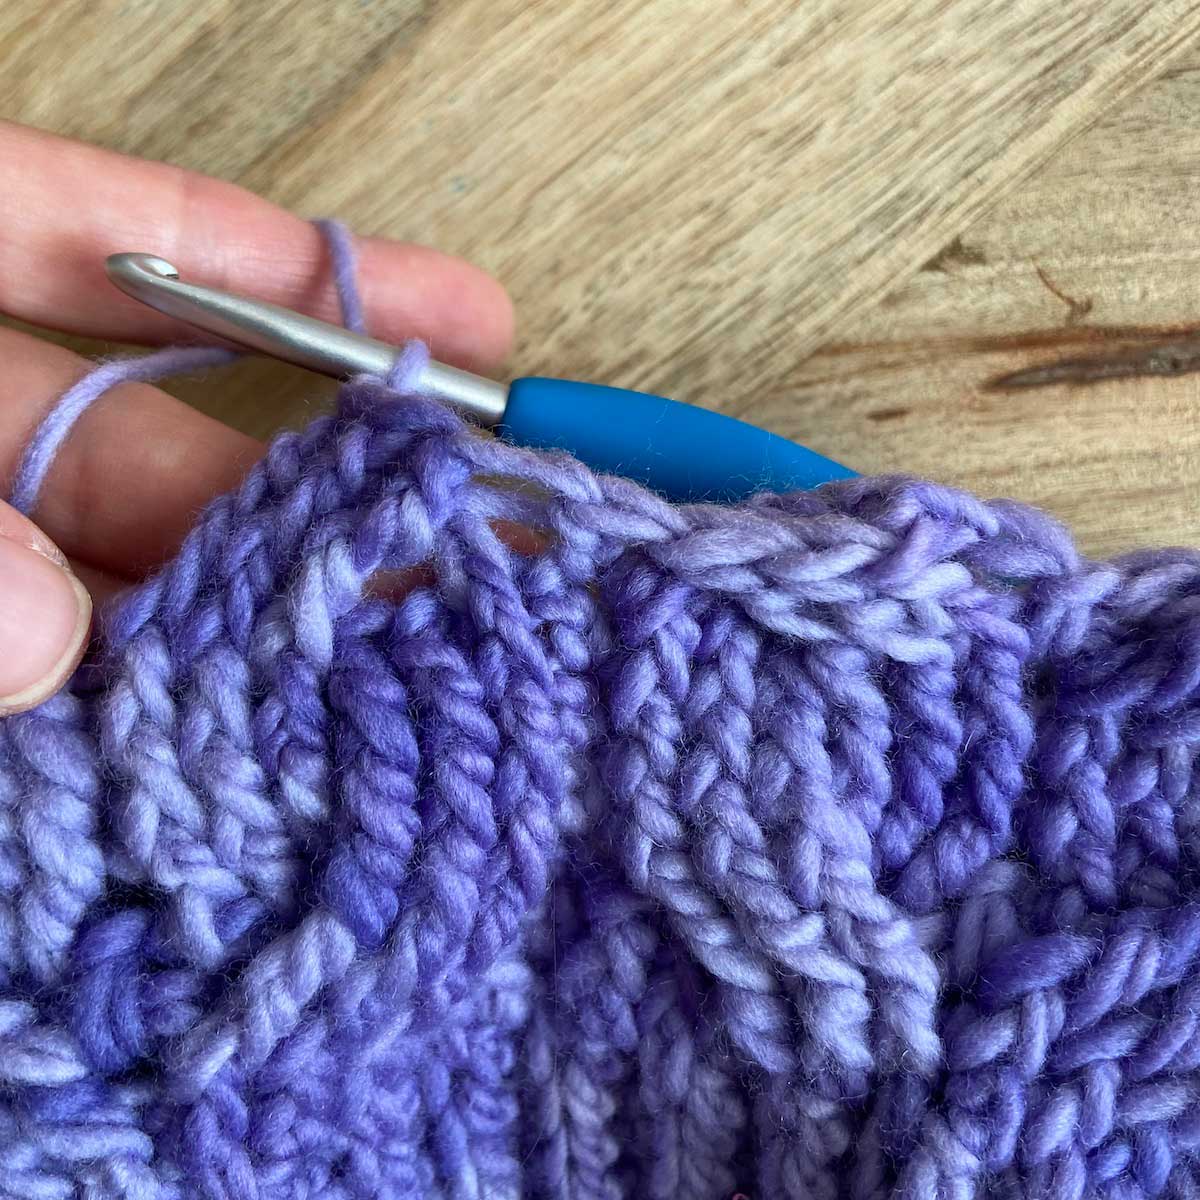
After making 2 more FPtr in the next 2 skipped stitches, the cable looks like this:
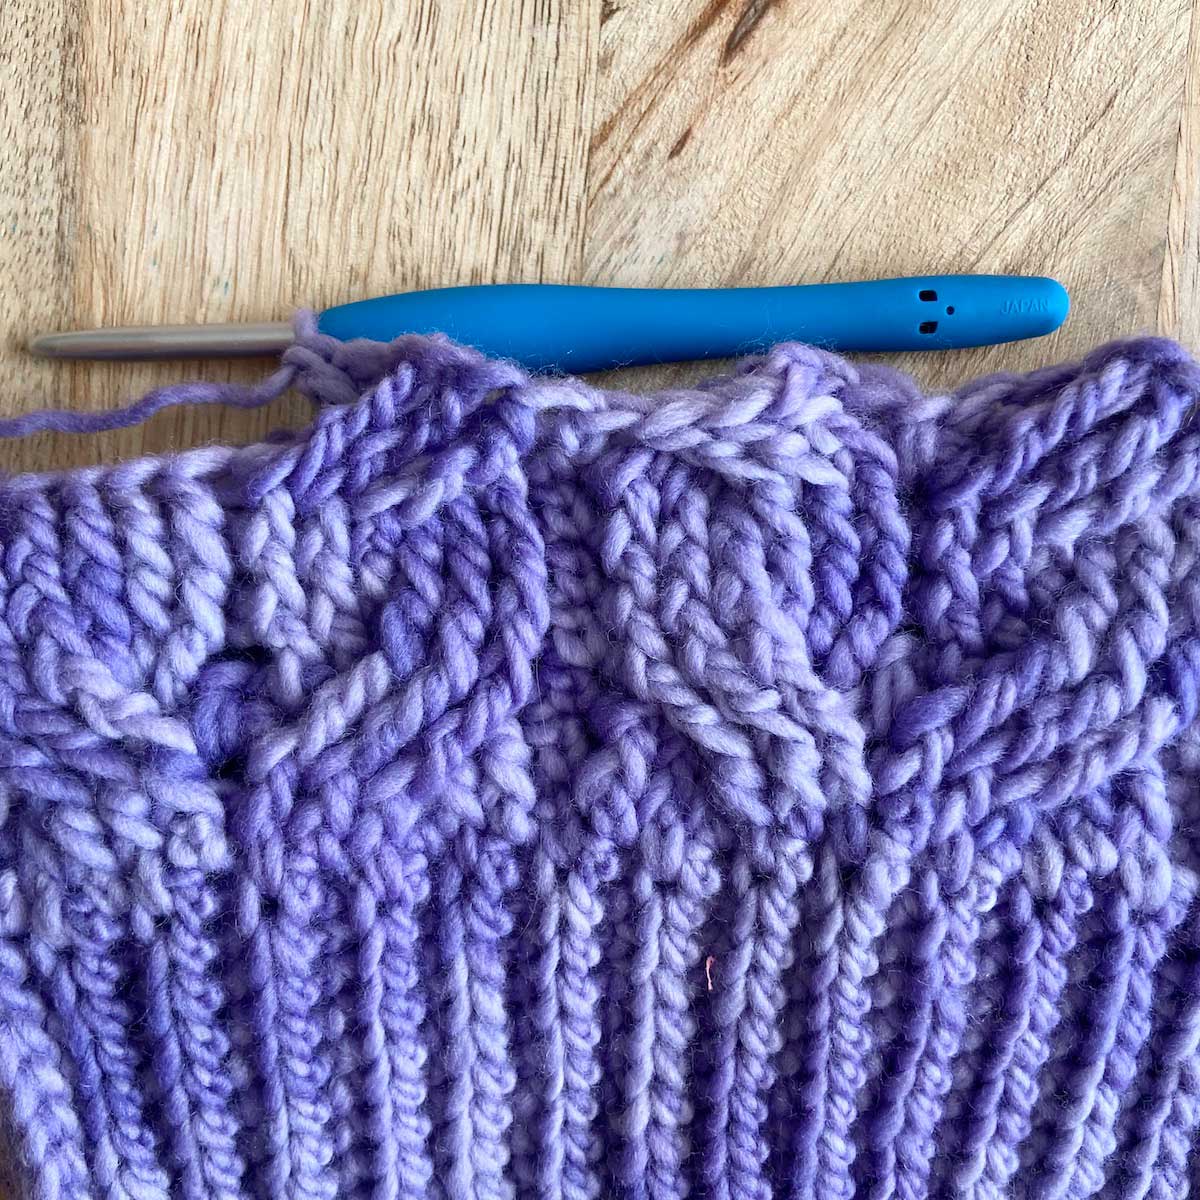
You can see here that this cable is leaning to the right. Now you can compare how working in front of your stitches versus working behind your stitches can affect how the cable twists!
The hat pictured in this post is called the Glacier Cable Beanie. You can find the free pattern download here, and check out the accompanying full video tutorial.
Very good tutorial. I love the color of that lavender blue yarn. May I ask what it is and where you got it?
Oooohhh... looks like I have a leeetle beeett of practicin' ta do!!!😊
Still learning on FP and BP. Thanks for your tips.