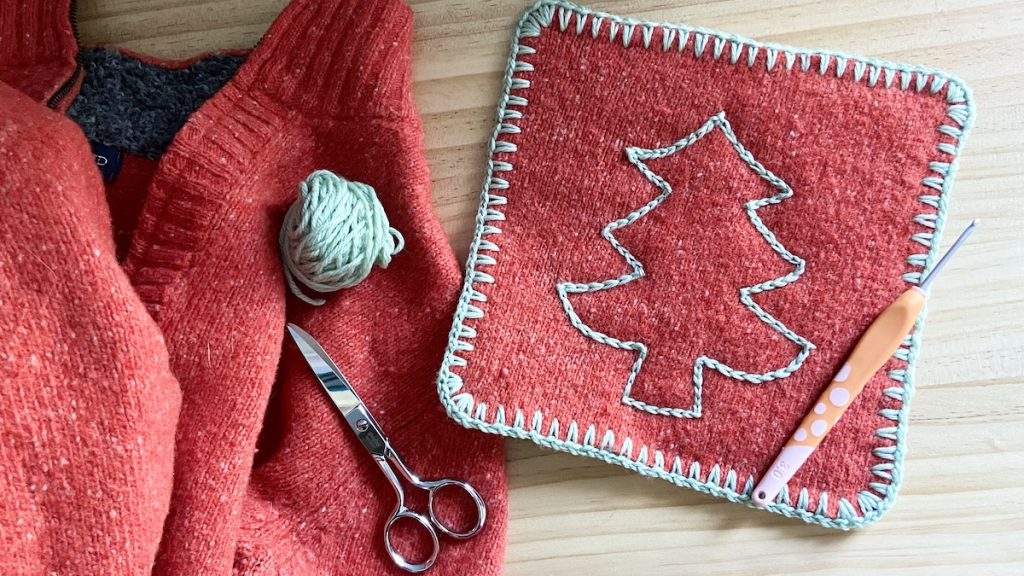
Use a little bit of creativity to repurpose old wool sweaters into these cute crochet potholders! For the past several years I’ve been on an upcycling kick; I just love rescuing old un-loved wool sweaters from the thrift store and giving them a new life. As a sewist, I often repurpose them as mittens or hats. But lately I’ve been finding ways to incorporate them into my crochet and knit projects as well!
Looking for a unique crochet gift idea? This crochet potholder is just about as easy as it gets! Plus, takes less than an hour to make (after sweater is felted). This is a great crochet project for the gift-giving season; most people use potholders, they don’t need to be made to a certain size (or fit anyone), they are easy to personalize, and they are inexpensive to make!
Download the free crochet potholder pattern, including photos and tree template here!
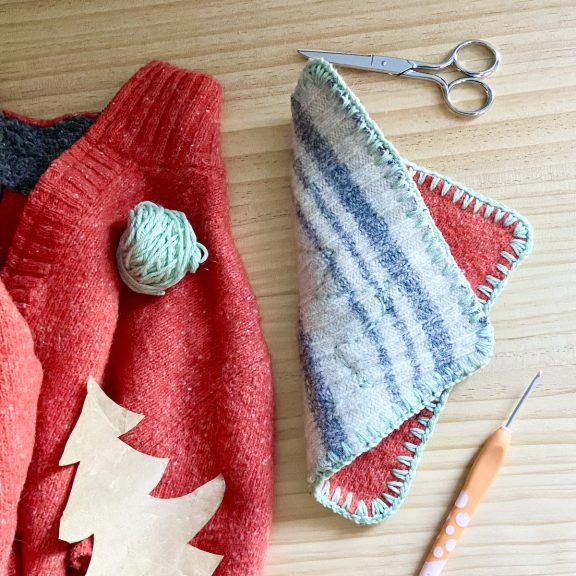
Here is what you will need:
- • Felted wool from old sweaters (see below)
- • Small ball of sport or dk weight wool or cotton yarn (#3). (See notes)
- • Metal crochet hook (see notes)
- • Quilter’s pins
- • Tapestry needle.
- • Washable fabric marker, or tailor’s chalk to mark tree shape for surface crochet
- • Piece of paper and pencil for pattern
Notes About Materials
Sourcing the sweater(s)
You will need at least one sweater, but this design looks really cute in two colors- one for the Front, and one for the Back (these potholders are double-layered). Two sweaters will likely make about 4-6 potholders, but this depends on the size of the sweaters after felting. These sweaters must be at least 95% wool (or other animal fiber) and they cannot be a “washable wool” or Superwash wool sweater; they need to be made of wool that will felt. Medium weight sweaters are easiest to work with. If you shop for sweaters at a thrift store, don’t overlook sweaters with stains or holes as those can be cut around! However be sure to check for moth eggs if you find a sweater with holes. Moth eggs will be killed in a hot water wash 120°F (50°C) so the felting process will likely take care of them. If you suspect there is evidence of moth damage, place the sweater in a ziplock bag until you are able to wash it in hot water.

Sourcing the yarn
This is a great time to raid your stash! I would recommend using a cotton or wool sport or dk weight yarn (#3). This needs to be 100% cotton or 100% wool (or blend of these fibers) because they will stand up to strong heat, whereas a synthetic fiber (like acrylic) could melt or light on fire.
The yarn you will be using does not need to felt. In fact, you may want to use a Superwash wool (a wool that is treated so that it will NOT felt). This way, you can machine wash these potholders. If the wool were to felt, it would likely shrink and the edges of the potholder might curl. Likewise, if you use a cotton yarn, it might shrink a bit if you put the potholder in the dryer. For this reason I prefer to use a washable (Superwash) yarn so that it will not shrink. I also like the fact that wool is naturally flame resistant, and self-extinguishing.
I used the following yarn in my project:
Cascade 220 Superwash Sport (sport weight, 100% Superwash wool; 136.5 yards [125m]/ 1.75 oz [50 grams]): Cockatoo #256; partial skein.

Tips for choosing the correct crochet hook
A smaller hook will pierce through the wool fabric easier than a large one. Use the smallest hook that will work well with the yarn weight that you chose. Keep in mind though, that it needs to be big enough to pull the yarn through the fabric and not split the yarn. If your felted fabric is more dense, you may want to switch to a thinner yarn and smaller hook. Look for a metal hook that has a pointier tip; this will slide through the fabrics easier. I’ve had the most success using a 3.0mm hook with a sport weight yarn (#3).
Felt your sweater(s)
Wash sweater(s) in washing machine on hot setting. This process will cause the sweater to shed a bit. You may want to put the sweater in an old pillowcase so that it will hold the extra lint. I have a pillowcase dedicated to this part of the process. After placing the sweater into the pillowcase, I fold the opening closed (rolling it twice) and use safety pins to keep it closed. This may result in some small holes where pins are fastened, so this is why I recommend using on old pillowcase.
You can add detergent if you want, but it is not needed. Add an old pair of jeans to the cycle to help agitate the sweater; this will help it felt faster. Try to have a lower amount of water in the machine so that the sweater isn’t floating freely in the water, but rather it should be rubbing against itself and the other contents of washer. It might take a few washes to properly felt sweater. It needs to be felted enough so that it will not unravel when cut. The more you wash it, the thicker the fabric will get. You do not need to use a dryer between cycles, but it can help speed up the felting process. The sweater will felt further in the dryer, and often the dryer will help smooth out the texture if the sweater becomes very fuzzy. If you plan to machine wash these potholders, be sure that you felt the fabric until it no longer shrinks when washed. Otherwise, the potholders will shrink when you wash them!
When the stitches are no longer distinguishable, or the fabric can no longer unravel, your sweater is ready. Allow sweater to fully dry before the next step.
Make the crochet potholder pattern piece
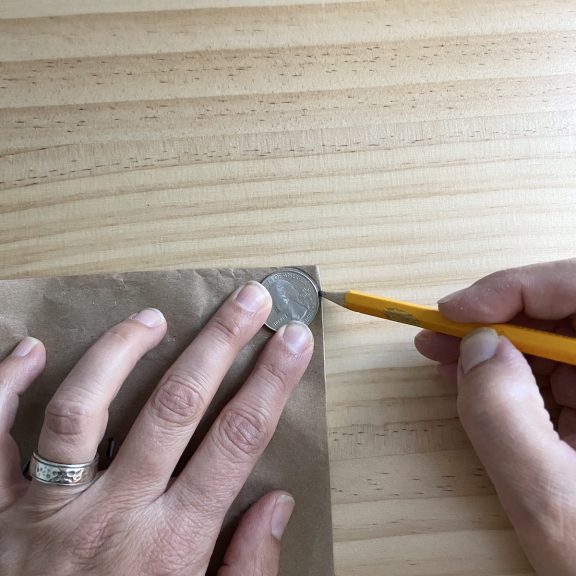
Draw out an 8” [20cm] x 8” [20cm] square on a piece of paper. Use a large coin or other small circular object to help you round off the corners of the square as shown. Cut these off of the pattern piece.
Cut out pieces
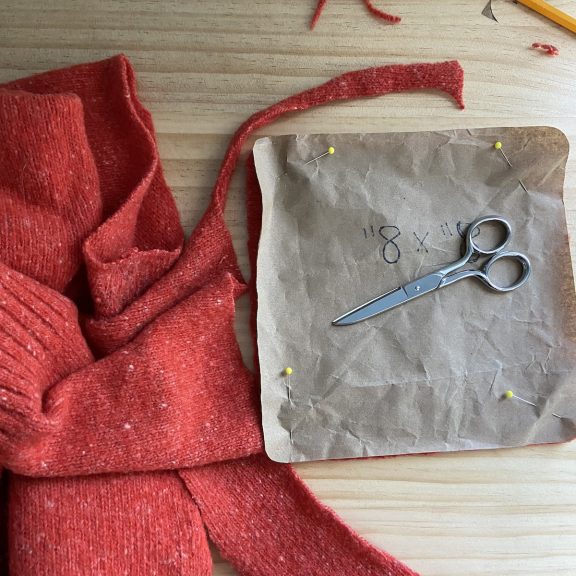
Use paper pattern to cut two squares of felted wool. Trim off any jagged edges as best as you can for a smooth edge.
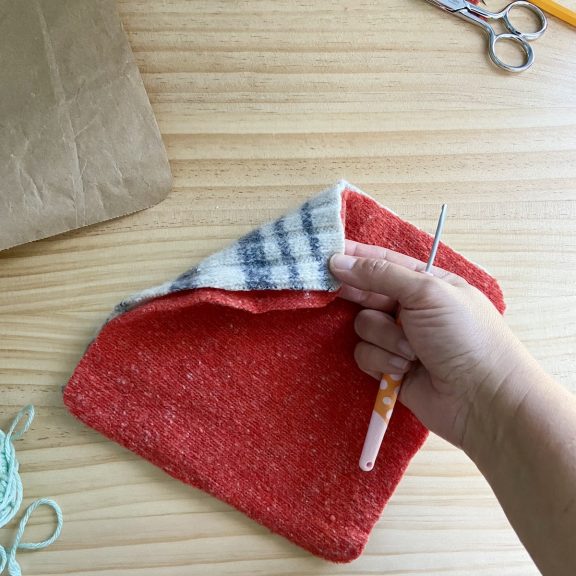
Crochet your pieces together
With WS held together, pin pieces together near edges. With a slip knot on hook and starting just before one corner, insert hook through both layers of fabric about 3/8” [1cm] away from edge.
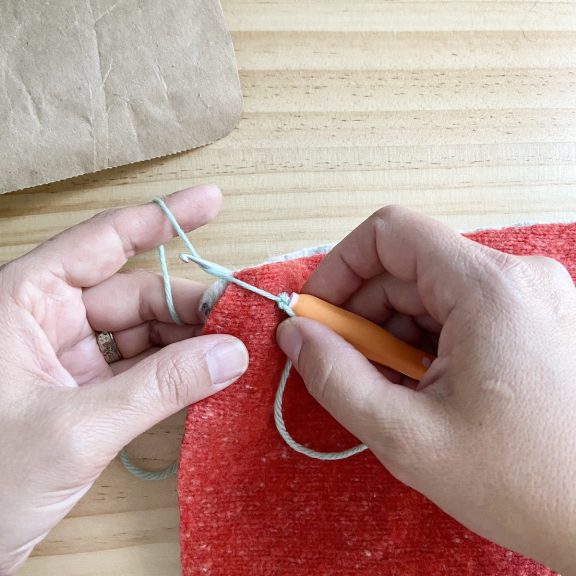
YO and pull up loop to height of edge of fabric, YO and pull through both loops on hook
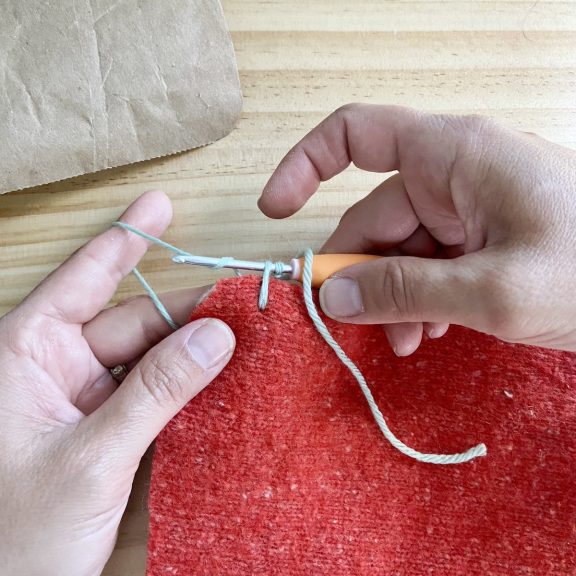
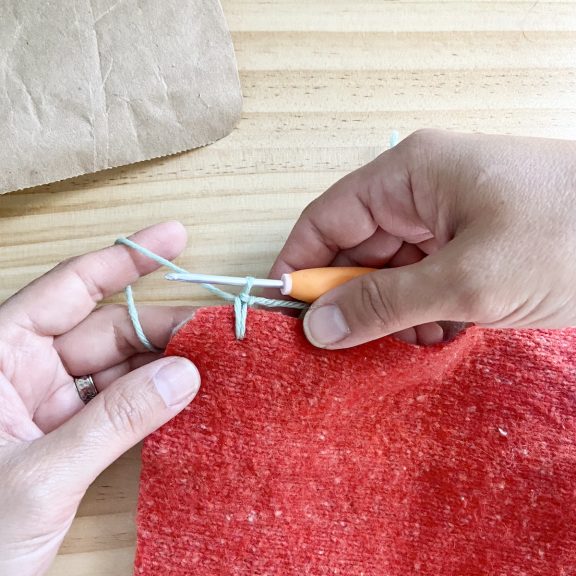
Ch 1, insert hook through both layers of fabric about 3/8” [1cm] away from first stitch, YO and pull up loop, YO and pull through both loops on hook to complete second SC. Continue making SC in this manner around edges of potholder. When you arrive at a corner, place two stitches into the same location (same hole made by hook) with a chain stitch between each SC (as usual). This will allow the crocheted edge to lay flat.
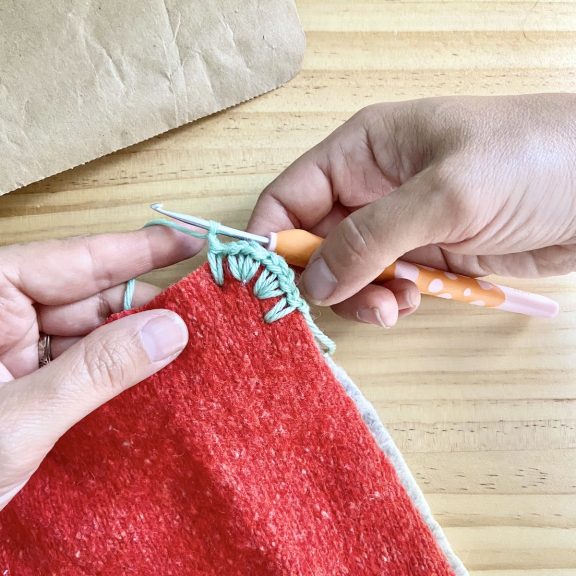
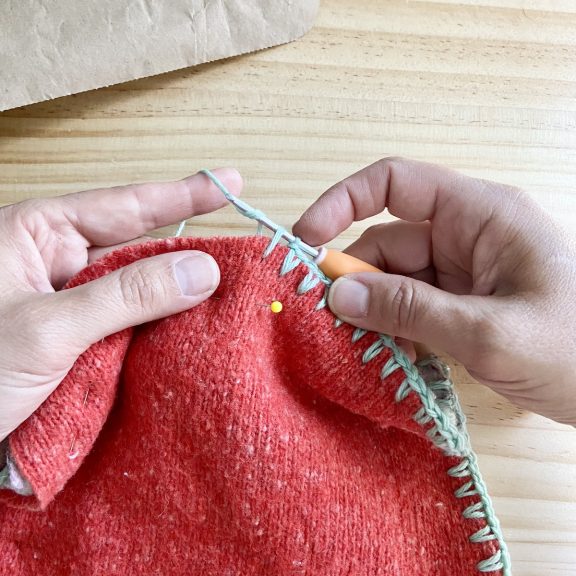
When you have made SC sts all the way around the edge, fasten off and complete the edge by using an invisible join for neatness.
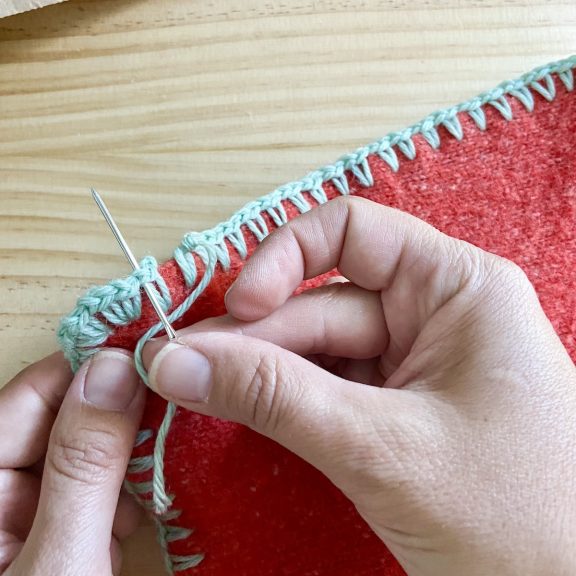
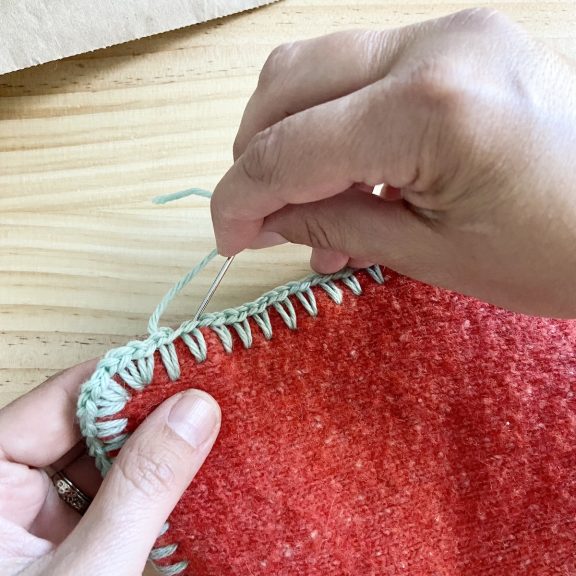
Add surface crochet embellishment
The surface crochet embellishment adheres the two layers together as well as adding visual interest. Please do not skip this step, but feel free to create a different shape or words for the center of the potholder.
Decide which side will be the Front of the potholder (both sides will show the design, but the Front will be a bit bolder than the Back). Use the template, or freehand your own design with washable marker, centered on the Front of the potholder.
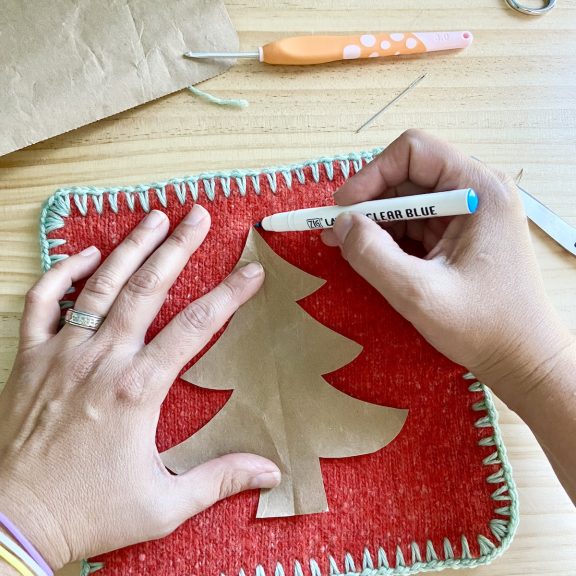
Beginning at the top of the tree, insert hook from front to back, through both layers, YO and draw up a loop to Front,
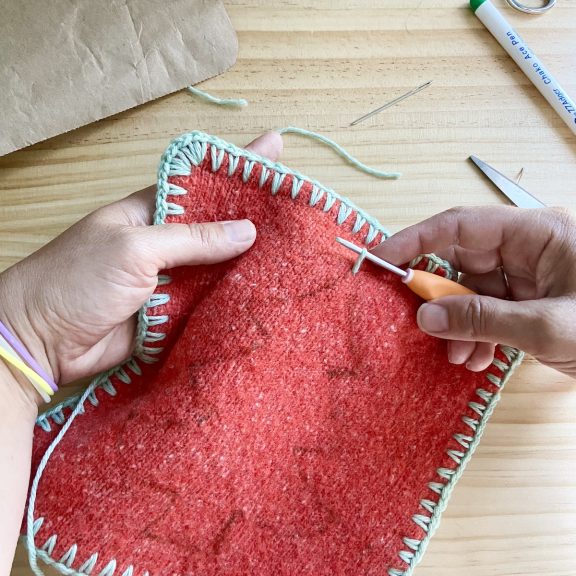
*Insert hook (through both layers) along the traced line about ¼” away from the previous stitch, YO, and draw up a loop.
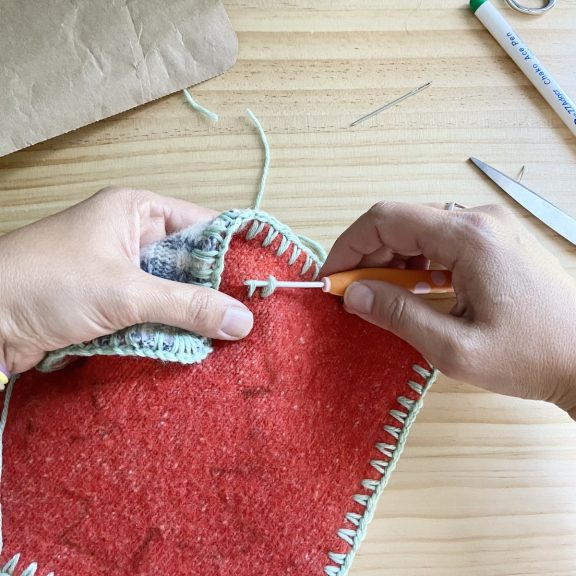
Pull this loop through the loop on the hook. Repeat from * working along the traced lines.
When you have completed the shape, fasten off with an invisible join and weave in ends along surface crochet but between layers of fabric so yarn tail is hidden.
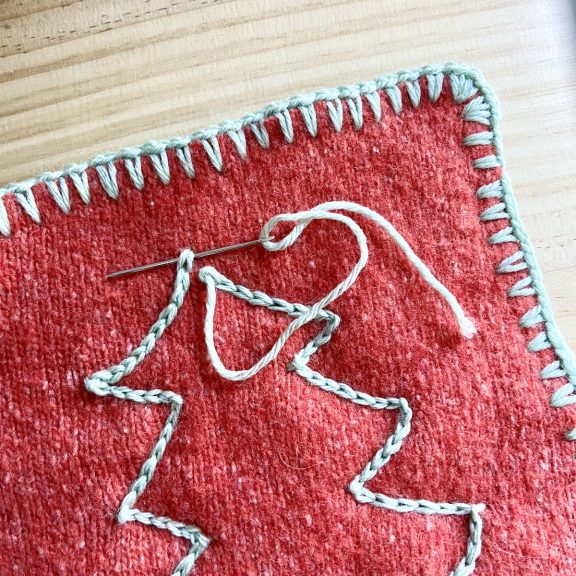
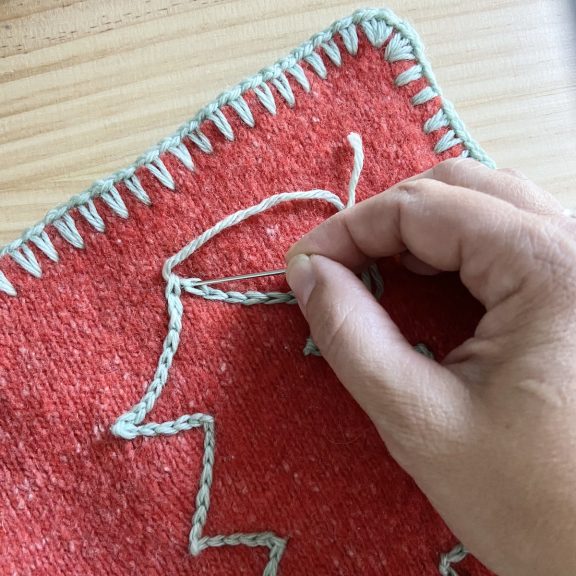
And that’s it! Now you have a beautiful new potholder!

Brenda, I'm returning to crochet after more than 40 years, when I made some granny squares and a poorly-constructed lap afghan. Now I'm trying to clean out my "sewing" room by using up all the stuff, including the yarn from way back then. I'm finding your 14-day "learn to crochet" videos VERY helpful, none seem to address the tension in holding the yarn. Some methods of holding it don't seem to let it slide and I find myself just letting it dangle over one finger. What is my goal? Thank you!