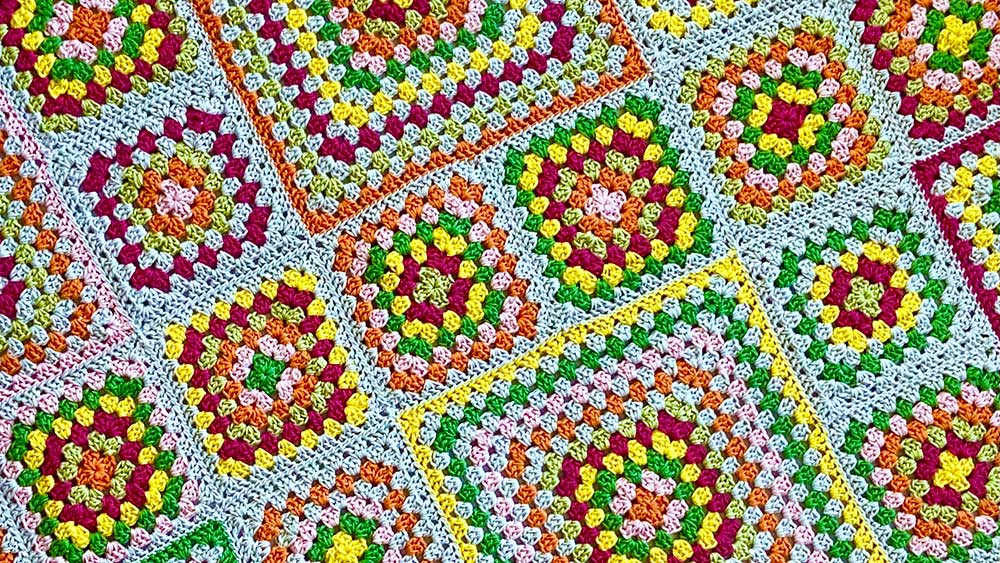
Granny squares are crazy popular right now, and for good reason: they perfect for experimenting with color, using up scraps, and creating blankets, garments, and accessories in a modular fashion. Only possible to be made by hand, they are the archetype of the handmade craft! However, they do have a bit of a catch: all those yarn tails! If you change color every round, there can be an overwhelming amount of yarn tails to weave in when you are done. For some of us, it’s just part of creating something so beautiful, but for others, it can cause a lot of grief and can even keep some of us from finishing our lovely projects!
For projects that will not get washed a lot or that use a thinner weight yarn (where the stitches are small), I use a method of crocheting over the yarn tails as I add the next round. I just hold the yarn tails along the edge of my work and crochet over them, encasing them as I stitch. This is a simple method to follow, but I was looking for a method that seemed a bit more secure for projects that I knew would get washed often. I also wanted to make sure that whatever I came up with did not add extra time to my project or become too fiddly.
I experimented a bit, came up with a way that worked well for me, and now I want to share my method with you! This method works for the type of granny square that does not have a chain-1 space between each of the 3-DC groups, and there are 2 chains at each of the 4 corners. If you would like to see how I make this type of granny square, you can watch this live tutorial here on Creative Crochet Corner, or this tutorial on Craftsy (beginning at timestamp 1:48:13). Below is a chart showing the way this type of granny square is made, so you can see where the rounds start and end.
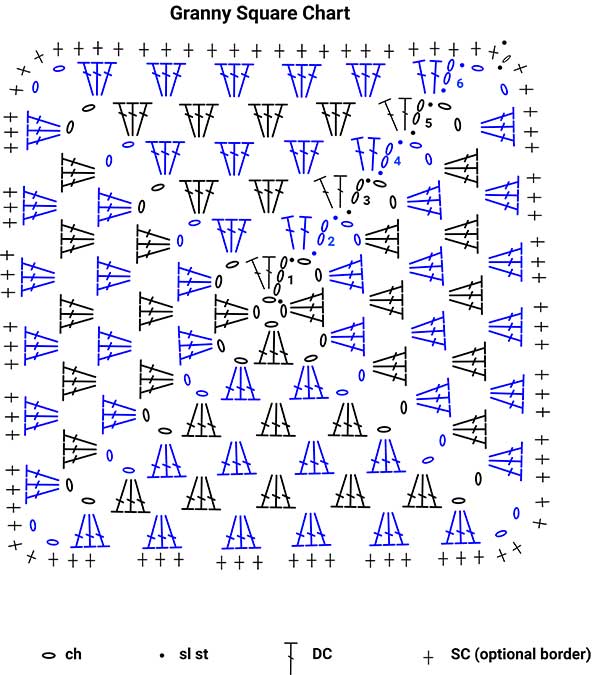
To try out my new method of reducing yarn tails, work the first round of the granny square as normal.
Work the second round as normal, but after joining at the end of the round, ch 8, then fasten off leaving a 6” [15cm] yarn tail.
*Begin the next round as normal.
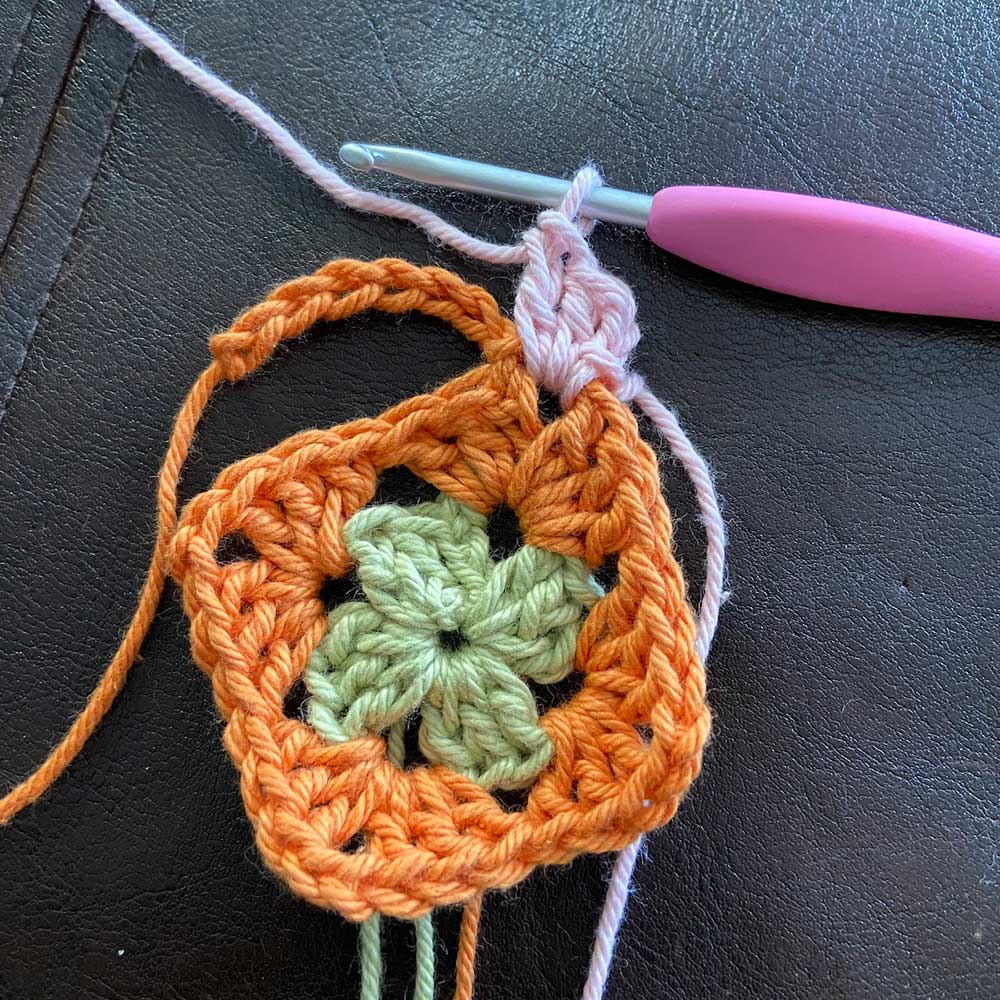
After completing the first 3 DC of the round, fold the yarn tail and 8 chains along the top edge of your work.
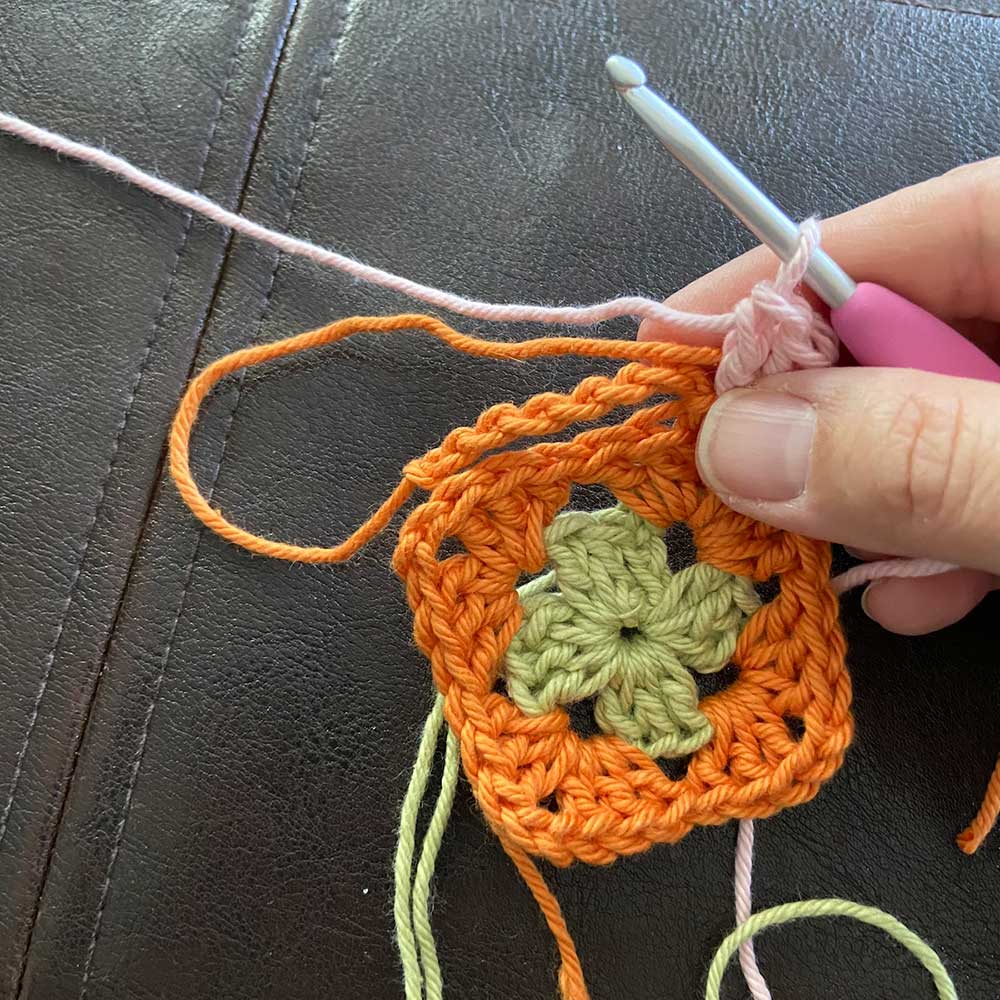
Hold the chain and yarn tail in place while you make the next DC around them to trap them in place (working into the usual space between groups of DC).
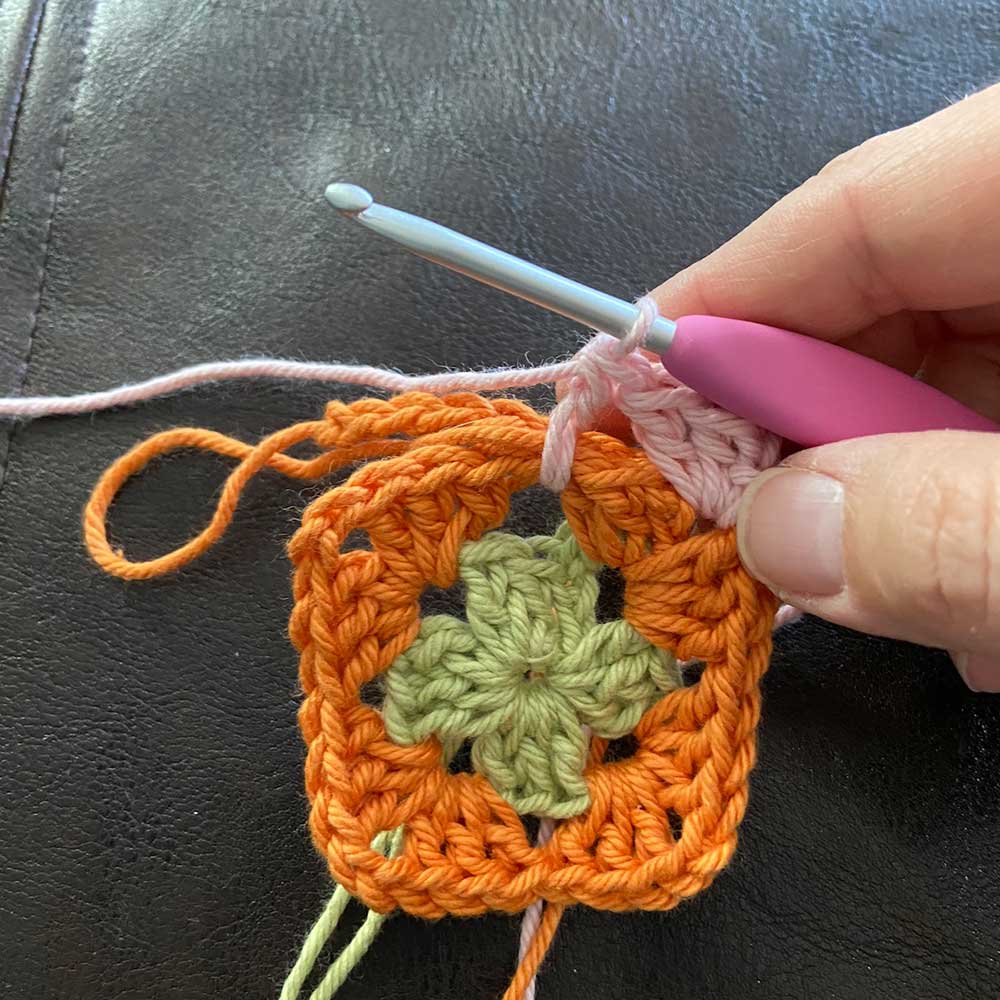
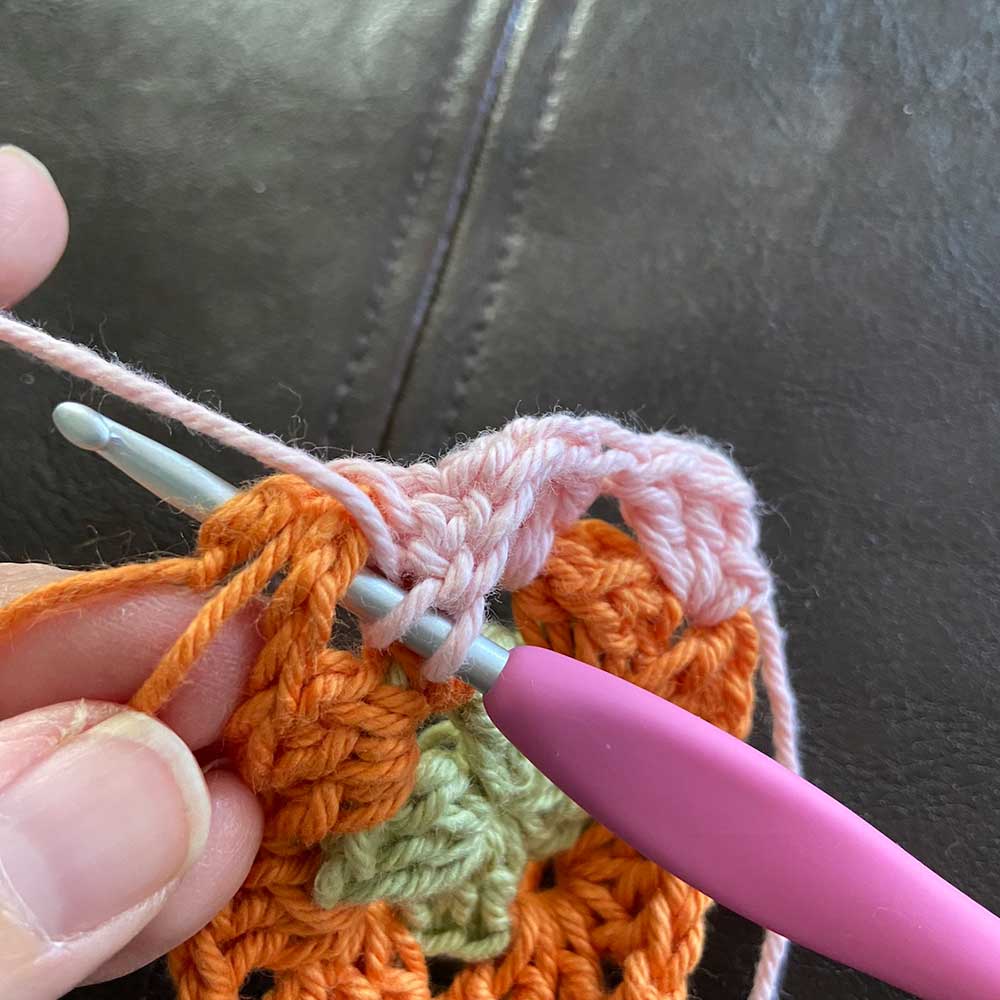
On the next DC, YO, then insert hook into the same space between sts, but also into the 4th chain of the ch-8 strand. You may need to pull on (reposition) the chain in order for the chain stitch to be in the right place. Make sure that you are still encasing the yarn tail as you do this. YO and pull up loop (pulling back through the chain stitch and back through to the front of your work), [YO and pull through 2 loops on hook] twice to complete the DC. Let’s call this a fastening DC because we are fastening the chain to the back of our work.
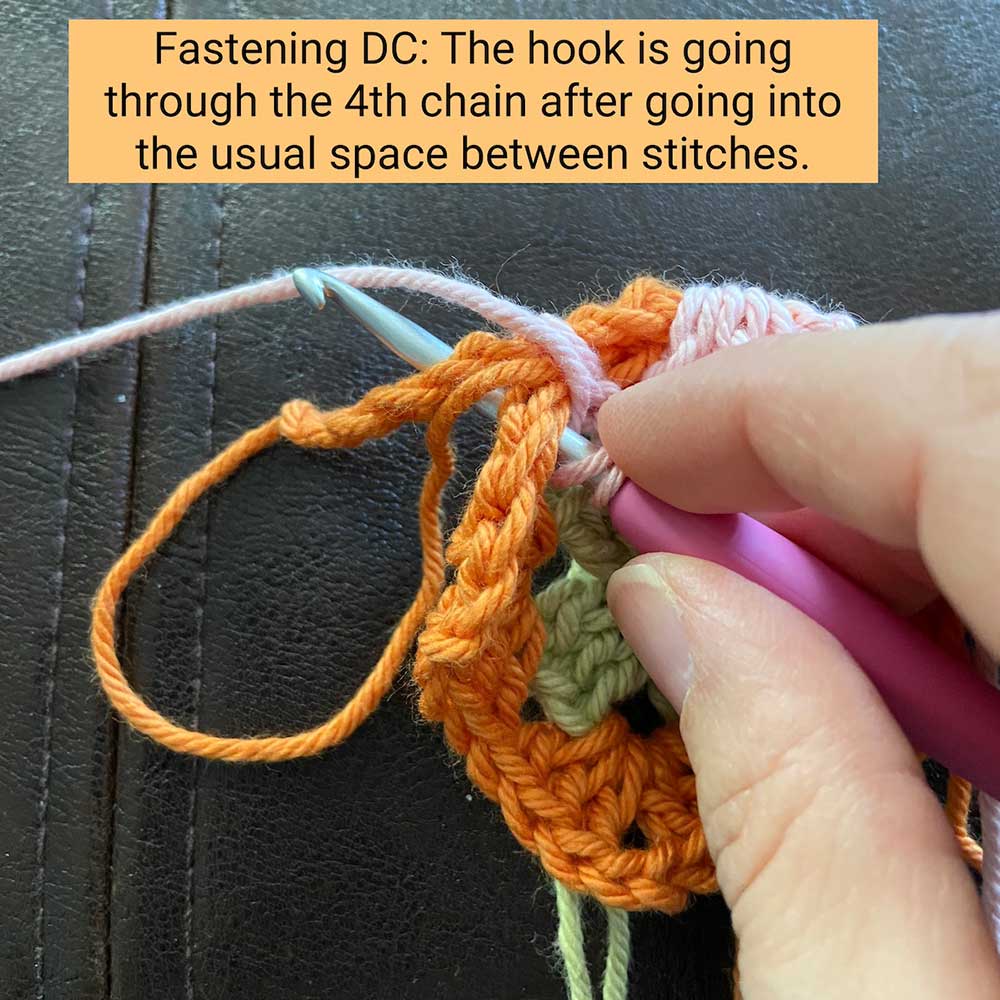
Place one more DC into the same space between stitches, this time encasing the chain as well as the yarn tail, just as we did before the previous stitch.
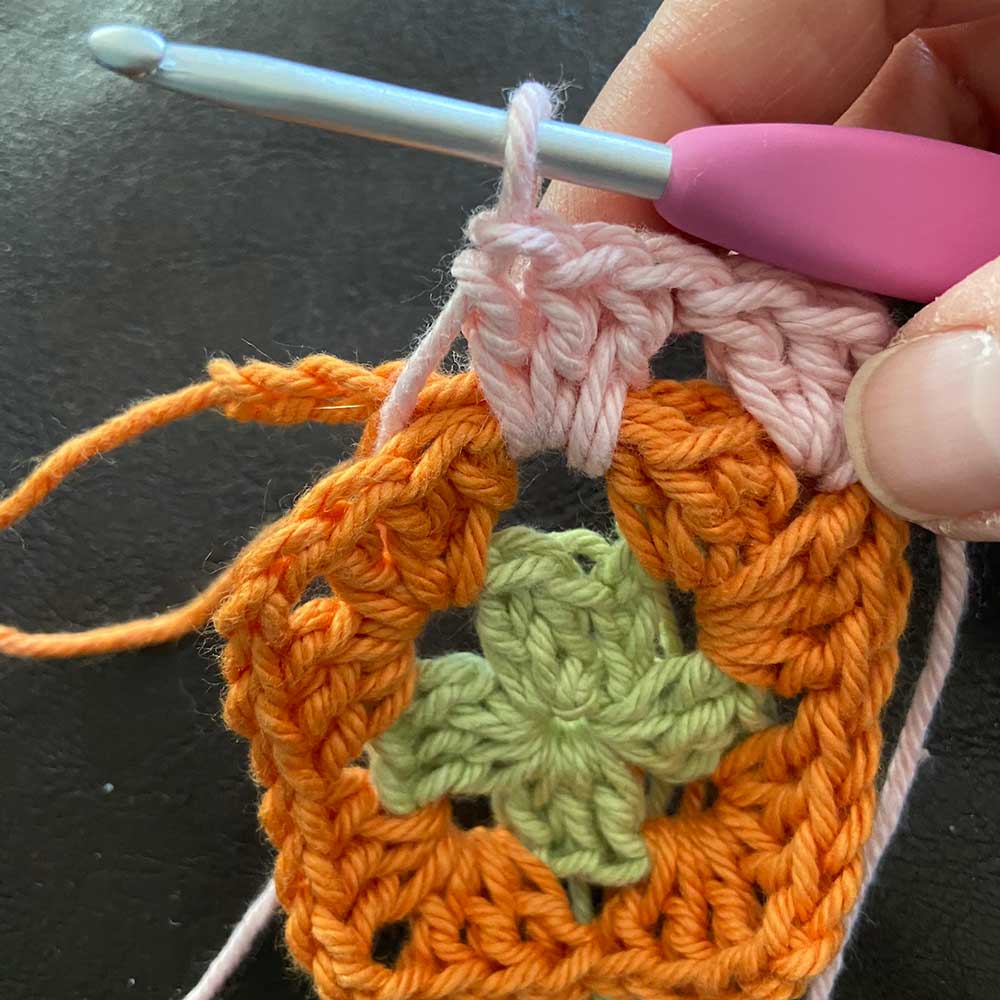
On the next group of 3 DC we will make 2 DC sts into the next space between stitches again encasing the chain and the yarn tail.
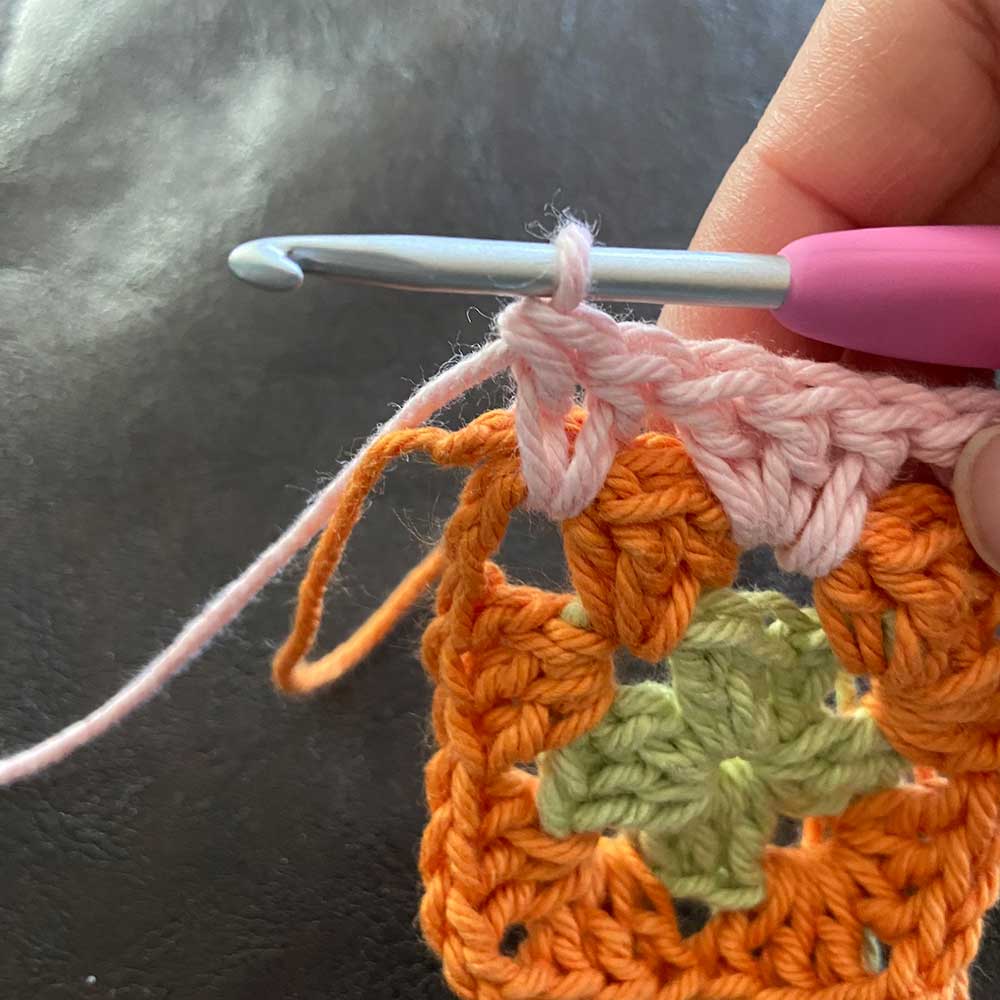
The 3rd DC of this group will be made as a fastening DC, through the 8th chain.
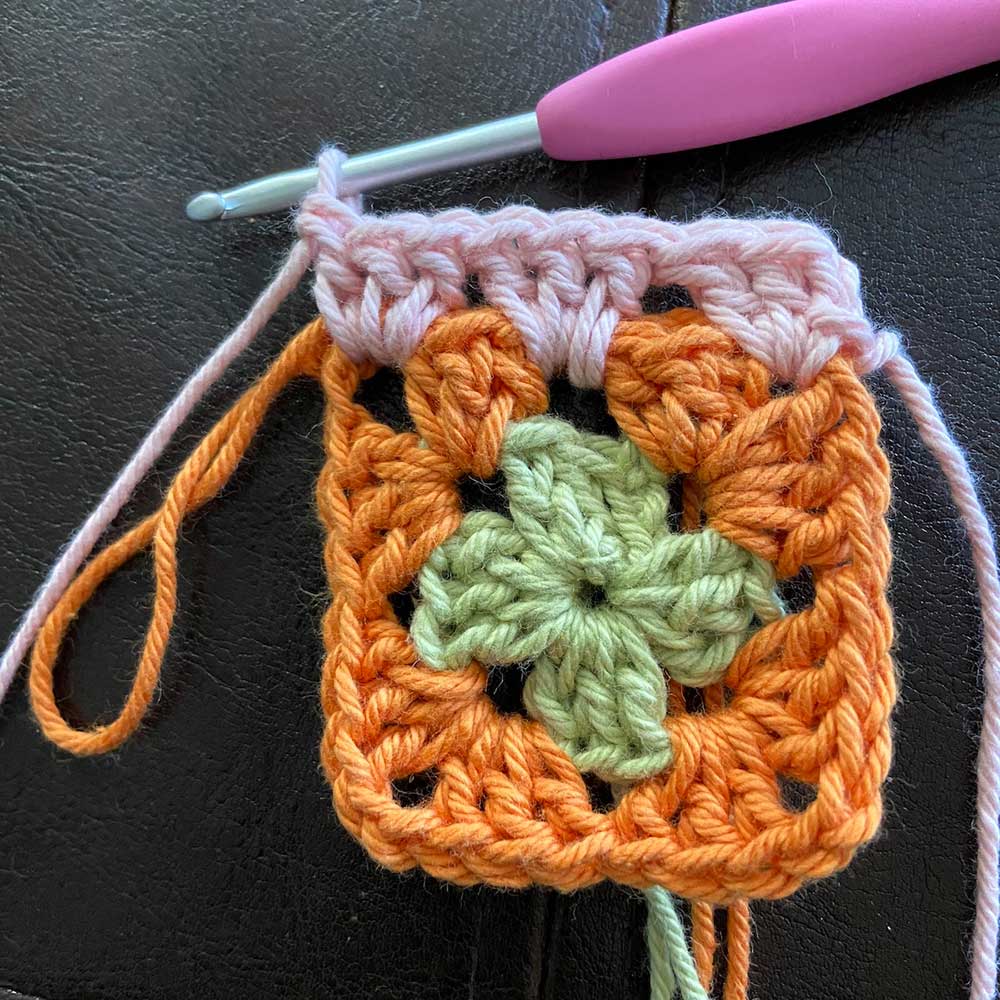
Pull on the ending yarn tail to straighten it out, then trim the end.
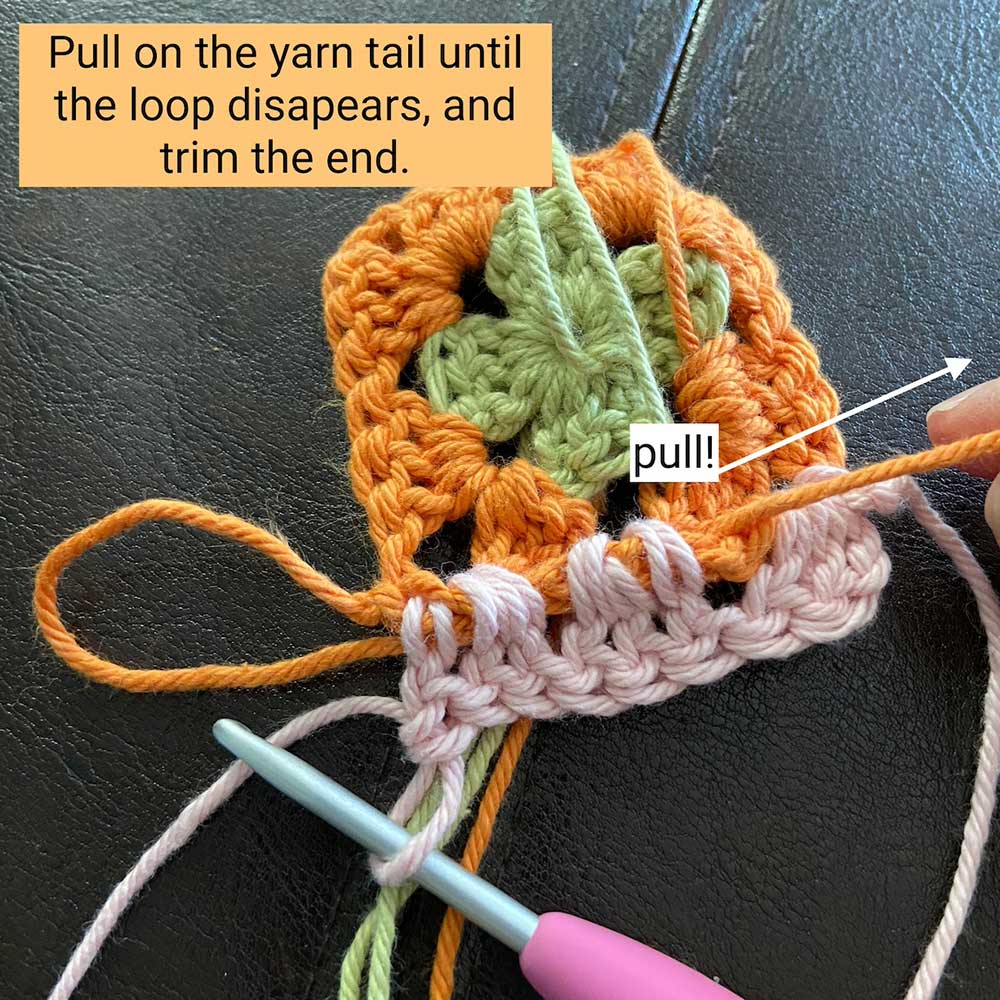
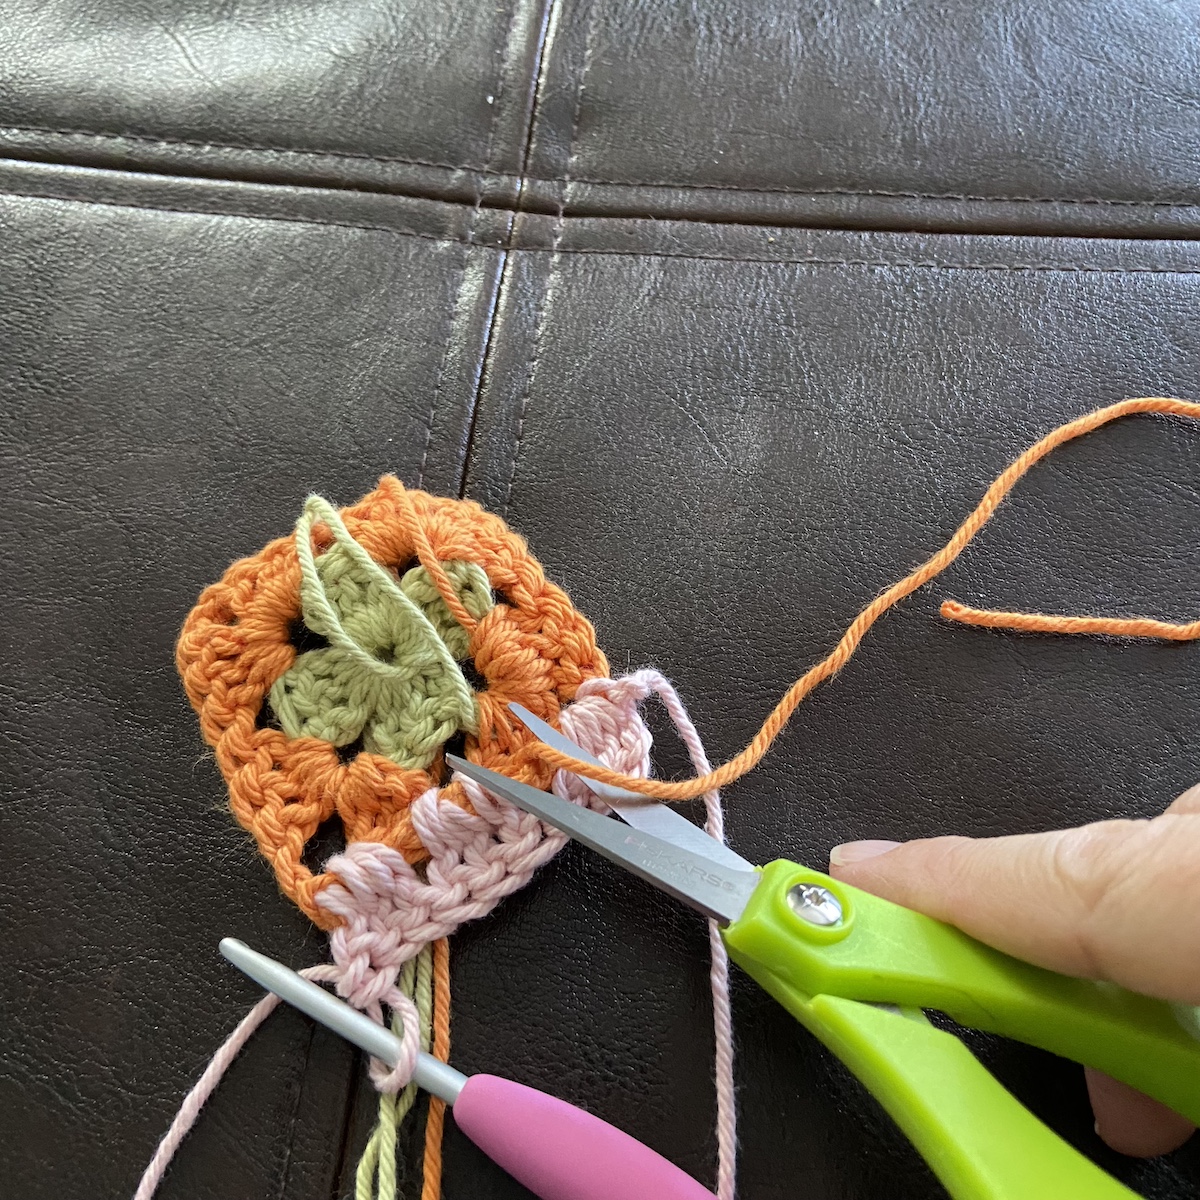
Now you don’t have to weave in the end! Keep working in this method by finishing each round with a chain-8, then crocheting over and into the chain and yarn tail to trap it in place.
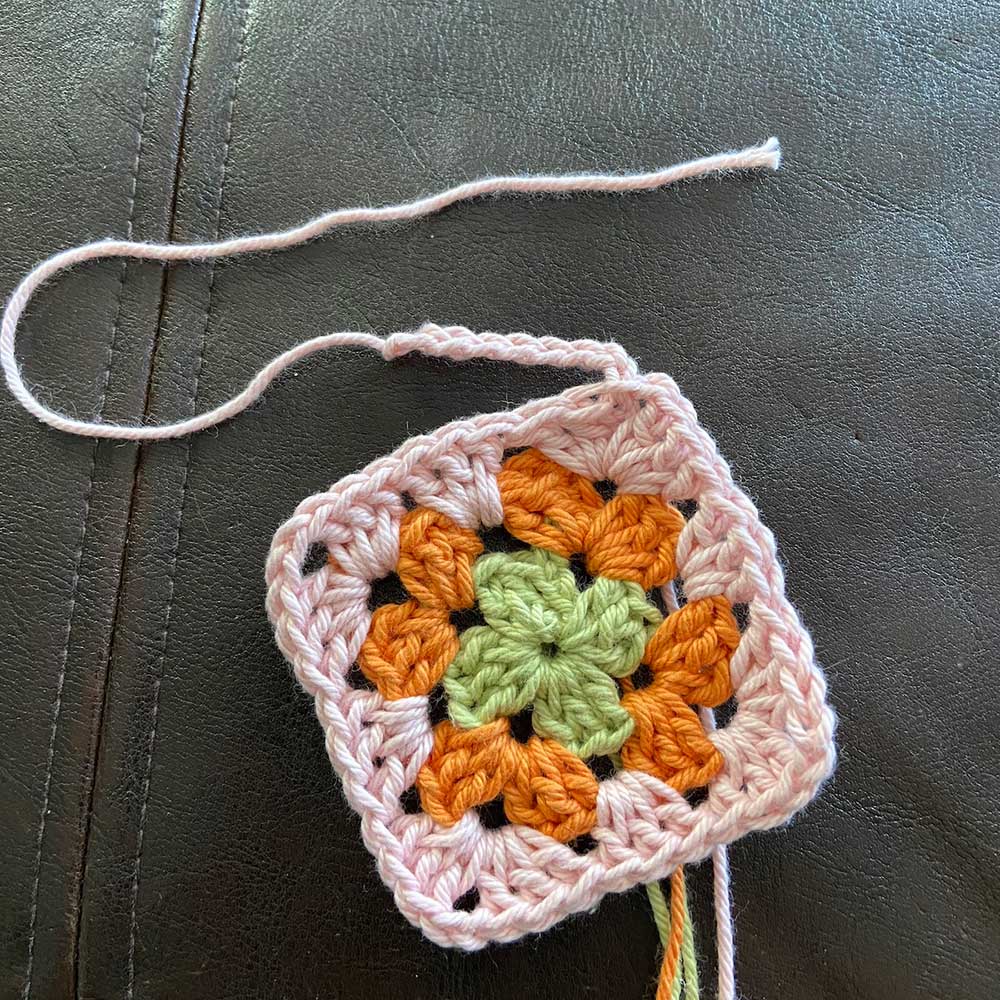
This method isn’t perfect, there is a bit of a raised ridge on the WS of the granny square, but the RS looks great, the yarn end is very secure, and it does cut the amount of ends to weave in by about half, so to me that’s a win! You may find that it adds a bit more time the first few times you do this, but with practice, it gets much quicker!
If you try this method, or if you have another method of dealing with your yarn ends, let us know in the comments below!

I’m new to crochet, but have been knitting forever, and knitters have a similar “weave in the tail” that I use all the time, more yarn in this though, can’t wait to try it!
That's a great way to weave in the ends. I can't wait to use it
Great closeup photos and clear written instructions. It would make it more secure and not work itself out.
I can't find the video tutorial
Why 8 chains. Couldn’t you do the same with less. But good method.
Thank you. I am always trying new ways to make things secure.. Have had to repair things and this may remove need fir repais!!! Thanks again
what a super idea
Doesn’t this make for a lot of added bulk?
Amazing advice! Thanks a lot!
Thank you for this great idea.